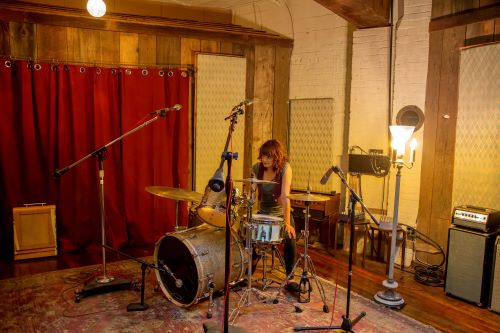
If you have a drummer in the family–you know, noise. Drums have the advantage (???) of creating both Airborne Noise and Impact Noise. Depending on the location of the drums; one, or both could very well be annoying–to say the least. The volume range put out by a drummer in full flight is between 90 and 130 decibels, which is somewhere between a lawnmower and an ambulance siren. This volume of noise might be acceptable outside for a short time but in your basement, or the spare bedroom, for 3 or 4 hours non-stop . . .
So, if drumming is a serious aspiration for someone in your house, or a lifelong habit or hobby, soundproofing the room is fairly essential. To have harmony in the family and with the neighbors, and to keep the local constabulary away from the door.
5 Key Drum Room Soundproofing Considerations
The absolutely best option for drum (or any other music-making) soundproofing is to put up a building from scratch with ‘making it quiet’ and ‘acoustically perfect’ as the prime considerations. Unless your occupation involves music-making, podcasting, You Tubing, or any other noise-making endeavors, this is very rarely a sensible option. You will need to work with what you have–basement, spare bedroom, garage–whatever is available. Please see our article How to Soundproof a Garage.
It might not hurt to pick up an inexpensive decibel meter. Use it to check out noise when beginning your project and as you progress through the various stages of soundproofing. This will give you more information about what works well and what things are less successful.
1) Soundproofing the Floors
Concrete floors in basements or garages are not going to be your biggest problem. They provide plenty of mass. But you can still use some of the following ideas to deaden any Impact Noise that might leak out. If you are in an apartment with concrete floors and neighbors below, you can add extra soundproofing to the existing mass.
Wood-framed floors, on the other hand, need soundproofing. Even if there is no one beneath you, the impact noise will still travel through the framing into adjacent rooms. And if you are in an apartment with neighbors below and around you–silence can be golden, not to mention less stressful. Consider any, or all, of the following suggestions.
- Carpet the drum area with a fairly thick wool rug. First put down good soundproofing underlayment such as MP Global’s QuietWalk Plus. Although it is manufactured specifically for all kinds of laminate flooring, I like the versatility including the moisture protection when used on concrete. And the ability to provide a high Sound Transmission Class rating regardless of the type of substrate it is installed on (usually an STC value of over 50 for the total system). Then put down carpet underlayment like RUGPADUSA, and a dense wool carpet. A roll each of seaming tape and 2-sided tape will come in handy to keep everything in place–if necessary. And a drum rug on top of it all will keep the equipment stationary.
- Tennis ball isolation drumming platform. I have no experience with this system, but it seems fairly popular. I like the idea of the isolation and decoupling. If a person added something like a puzzle exercise mat to the floor before building one, I think it would be fairly effective. There are plenty of You Tube videos on the construction and effectiveness of using one. (Being slightly oversized–a better word than fat–I might add a few extra tennis balls under the seat portion of the platform.)
2) Soundproofing the Drum Room Walls
Walls are the largest area you will have to deal with in a room. The sound that reaches them is almost all Airborne Noise. At that point, the molecular vibrations in the air will be transferred to the wall structure and so pass into the next room or outside.
Unfinished Walls
Unfinished, bare stud walls are the easiest to soundproof. First seal all of the gaps (see Soundproof Sealing below), then insulate with RoxulProRox SL 960 Rockwool soundproof batts. (Note: Another excellent soundproofing insulation is blown-in cellulose fiber–either wet or dry.) Add Mass Loaded Vinyl to the studs, and 2 layers of 5/8″ drywall with Green Glue soundproofing compound between them.
(Note: When installing the second layer of drywall, ensure that the joints do not line up with the first layer. I would even use acoustic caulking in the joints, and especially in the corners of the first layer.)
Tape and paint the drywall. You are now ready to add your acoustical treatment. Please see our article How to Sound Treat a Room.
Even concrete or concrete block walls are fairly simple because you will usually build a stud wall inside the concrete. Before framing your wall, cover the concrete with 6 mil poly vapor barrier to prevent moisture from getting to the insulation. It can be stuck on the wall with a lots of good acoustic caulking spotted every 16″ both vertically and horizontally. (Spots should be about 1/8″ thick and at least an inch in diameter.)
Do not frame your new wall tight to the concrete. Chalk a line on the floor at least 4″ out from each corner and check the measurements in a few places on each wall to ensure there is enough room for a 3 1/2″ stud. Use a 4-foot level to check the concrete wall is relatively plumb. You may have to adjust your chalk line to allow for inconsistencies in the wall.
Note: Although this may come as a huge shock to some, concrete (particularly concrete block) walls are not always consistently straight and plumb. (I once changed windows in a concrete block wall that was bowed into the basement 6″ because the owner had done a very good job of packing down his new driveway beside the house.)
Once your 2 x 4 (frost walls, as we in the north call them) wall is framed, proceed with your soundproofing as described above.
Finished Walls
Finished walls (be they drywall, paneling, or whatever was handy at the time) will present different challenges. Often they have no insulation; hence very little soundproofing. Unless you want to tear everything back to studs, you will have to work with what is there. You can add mass with one or two layers of 5/8″ drywall with Green Glue between the layers. You can also use MLV on the existing wall, then at least one layer of drywall. Or install MLV and Green Glue between layers of new drywall.
For added decoupling of the walls, install Sound Isolation Clips c/w hat channel on the existing wall finish, then add your choice of drywall, MLV, Green Glue. For more information on Isolation Clip installation please link to acousticalsolutions.com.
Inexpensive and Quick Soundproofing Solutions
If you do not have the time, money, ability, or patience to tackle the above suggestions, the Cole’s Notes soundproofing method goes straight to soundproof blankets. Regardless of the type of walls you have, hanging blankets over the entire area will cut the sound significantly. (Note: If the 6-year-old noise-making drummer is turning into the 14-year-old Gene Krupa, you can always revisit your soundproofing options.)
Should you choose this method of soundproofing, give some consideration to these products.
- Audimute Sound Absorption Sheet. 54″ wide x 95″ high, Noise Reduction Coefficient (NRC) of 0.85 (means it absorbs 85% of the sound hitting it). Great product, but a little expensive when doing large areas.
- US Cargo Control Large Sound Blankets. 80″ wide x 96″ high, heavy blanket with grommets along with one the top. Great, inexpensive product that covers a lot of areas.
For more blanket details and options, please see our article Soundproof Blankets for Windows.
3) Soundproofing the Drum Room Ceiling
Essentially ceiling soundproofing is much like wall soundproofing. Just more difficult to work on because they are up there.
Note: If you are installing drywall to both the walls and ceiling–it is customary to do the ceiling first.
Why do I have to soundproof the ceiling? You ask. It just goes into the attic where no one lives because of Airborne Noise creating vibrations in the framing members and transmitting sound not only into the attic but into the adjoining rooms.
Unfinished Ceilings
Unfinished ceilings, like unfinished walls, are fairly easy to soundproof. There should not be many gaps to fill but check anyway. Acoustic caulking is not expensive, so when in doubt, apply a bead along any visible joints, cracks, or apparent gaps. Then install RoxulProRox SL 960 Rockwool soundproofing batts between the exposed floor joists. If you plan on MLV, get a friend or two to help. The stuff is heavy and just as rigid as a baby’s blanket. Meaning it will probably be hanging on your head and shoulders, and the floor, and wrinkle if you are working alone. It can be held up with staples–just use lots of them, make sure they have wide crowns. If you have an air stapler, you will be a lot happier.
Then put up your double 5/8″ drywall with Green Glue between. I would use acoustic caulking in the seams of the first layer, and make certain that the joints do not line up. You will need friends for this also–or rent a drywall lift–or both. For added decoupling, use isolation clips and hat channel on the undersides of the floor joists between MLV (if you use it) and the drywall. acousticalsolutions.com sells the clips and has great installation information.
Finished Ceilings
Finished ceilings limit your options. Short of ripping it all back to bare joists, here are some options.
- Add 5/8″ drywall. You can add one layer or double it up with Green Glue sandwiched between. You can also install MLV and/or isolation clips with hat channel before the drywall.
- Install an insulated T-bar hanging ceiling. T-bar can be purchased from most home improvement outlets, where you will likely get step-by-step installation instructions. This will give you a certain amount of decoupling along with the soundproofing value. (Not perfect because the wires are still attached to the joists, but every bit helps.) Some T-bar panels are advertised as noise-blocking or soundproofing.
4) Soundproofing the Drum Room Door and Windows
These are probably the worst offenders when it comes to sound leaking out of your drum room. Windows to annoy the neighbors; doors to annoy the family.
Windows
If you do not want or need natural light and air, just block it off. Install a piece of 6 mil poly over the glass to help prevent condensation, fill what is left of the cavity with Roxul 80, and drywall right over it. If you do not take the window out, there is no exterior finishing necessary, and you can cut the drywall out any time to expose the window again. If this sounds like a dumb option (I like light and fresh air.), here are a few others.
- Acoustical Solutions ABSC-25 Audioseal Sound Blanket. STC ratings up to 33. It is 48″ wide x 96″ high or custom sizes.
- Audimute Sound Absorption Sheet. NRC rating or 0.85. It is 54″ wide x 95″ high.
- Nicetown Blackout Curtains. Absorb sounds and reduce noise transmission. Multiple sizes available.
More blanket and curtain options detailed in our article Soundproof Blankets for Windows.
Door
A good quality sound blanket or curtain is the quickest, easiest, and potentially least expensive soundproofing available for the door. To the options listed in the Windows section above, I would add :
- Residential Acoustics Acoustidoor Soundproofing Door Cover. Blocks 30 decibels (approximately 87% of sound). Will manufacture to size your order.
Another obvious option is to replace the door. If you have one of those 12 lb. hollow core door slabs, the sound waves are almost unimpeded by the thing. Replace the slab with a solid wood or solid core unit–1 3/4″ thick if possible. You should probably order it prehung in a new frame designed to carry the extra weight. (The added benefits include the hinges will fit, and the door handle will line up with the strike.) Insulate the cavity between the jamb and wall framing with 1 1/2″ spray foam and RoxulProRox SL 960 Rockwool or fiberglass, install the casing and handle. For more detailed information on soundproofing a door, please see our article How to Soundproof a Bathroom Door. (Different sounds from different doors–both can be obnoxious.)
Note: If you are adding drywall, make sure your door frame is as wide as the new wall is thick.
5) Soundproof Sealing
Airborne Noise creates molecular vibrations (a sound wave) that travel outward from its origin in all directions. Therefore if air can get through a gap, or crack, so can sound. In addition to the weather-stripping, a door sweep, and gap filling around the door and window, you should fill every crack or gap you can see. Use acoustic caulking for anything that will be covered, and paintable caulking for anything not being covered. In an unfinished room, caulk the sill plate to the floor, the cripple studs to the king studs, virtually any place where framing members meet without insulation.
In a finished room, you can remove the baseboard and caulk the sill plate. (Usually, the drywall is 1/2″ up from the floor.)
Note: Acoustic caulking is absolutely great at what it does. But most of it is black, stringy, never dries, and can leave a skid mark on stainless steel. Do not leave it exposed!
Additional Drum Soundproofing Considerations
After you have taken care of the basic requirements listed above, you should consider some extra tweaks to make the room quieter.
1) Room Within the Room
This is quite likely the only option available to guarantee a completely soundproof drum room. It is a fairly expensive and time-consuming undertaking. And you will lose floor space. (A 10 x 12 room is 120 square feet. If you build your room within a room with 2 x 4, sound isolation clips, and double drywall, you are going to make 22 square feet, or 18%, of your floor space disappear.) That may not be important, but if the kid also sleeps there, it could get cramped.
Even after framing the wall, insulating it with Roxul 80 soundproofing insulation, installing double 5/8″ drywall with Green Glue sandwiched in between, filling all of the gaps, taping drywall, and painting, you will have to deal with the floor and ceiling. Once all of this is done, you will have a skookum drum room where someone can bang away to her/his heart’s content without disturbing anyone else.
2) Flanking Noise
Flanking Noise is sound that travels in weird and mysterious ways from the drum room to other parts of the house far removed from the source. Quite often, it will resonate through your HVAC system. But blanking off the heat and air conditioning could have some annoying health side effects–too hot, too cold, not enough oxygen. If any of these symptoms occur, at least you know you did a dandy job of sealing up the room. If possible, you should place a heavy piece of furniture in front of the outlets–leaving enough room for air to get around it. Not a perfect solution. Another option is to hang a lighter blanket or curtain over them that will allow at least some airflow. Again not perfect, but better than nothing.
3) Acoustic Treatments
You can find much more on acoustic room treatment in our article How to Sound Treat a Room, but because drums produce low-frequency sound waves, give some consideration to adding bass traps to each corner of the room to absorb more sound. They will only enhance your drum room soundproofing efforts.
4) Technological Treatments
There is something out there called drum mutes (which claim to give a 95% sound volume reduction). Along with bass drum dampers, it is at least possible to have the little drummer boy (come on–it is Christmas) hammer away in his bedroom without anyone going crazy.
Also electronic drum kits are supposed to be much quieter than real drums. I suggest you do your own homework on this. My idea of quieter drums is to turn down the volume on the radio.
End Notes (Pun Intended)
With most of the suggestions, you will have to deal with extending plug boxes, light fixtures, and switch boxes. When you are dealing with that little issue, make sure you have a can of spray foam insulation handy to fill the gaps around the box. (If the gaps are 1/4″ or less, use acoustic caulking.)
I know that some of the suggestions appear to be overkill. But if you want a truly soundproof room, this will get you there. And other than the blankets, which can be viewed as a temporary solution, I think that ‘do it once, do it right is not a bad plan.