Strange, and rude, noises have been known to come from your bathroom. Some are acceptable in polite company; others not so much. Some of the noise passes through uninsulated walls, floors, and ceilings, and resonate along pipes, and heat ducts, and through gaps around services. But the bathroom door is usually the biggest culprit in spreading the noises into your living quarters. So, unless you have a perverted sense of humor, or enjoy inflicting your wannabe Pavarotti wailing on your family; let’s get it fixed.
Soundproofing a Bathroom Swing Door
Most bathroom doors are inswing. Meaning they swing into the bathroom. (An outswing door presents the possibility of whacking someone in the kisser as she/he saunters down the hallway.) The five main elements of effective soundproofing are: absorption, damping, decoupling, mass, and distance. With bathroom door soundproofing you can eliminate any thought of distance. And decoupling.
Unfortunately–for soundproofing purposes–your bathroom doorway starts life as a large hole in the wall that requires a door to provide an entrance to the room and some degree of privacy. And doors, like windows, are notoriously difficult to soundproof; while allowing them to effectively perform their main function.
Change the Door Slab
Most interior doors are hollow core (STC rating 20-25); meaning they contain very little, except air (and maybe a cardboard honeycomb) between the inner and outer skins (which may also only be about 1/8″ thick each side)–making them act like a drum transferring noise. Almost all interior doors are 1 3/8″ thick. The most obvious, and best, choice is to change the slab to a solid door. Some of the standard options are:
- Solid core slab with particle board core (STC rating 30-35)
- Solid core slab with dense wood block core (STC rating up to 55-60)
- Solid wood slab preferably a hardwood like oak (STC rating 30-35)
- Solid wood slab preferably a hardwood like oak 1 3/4″ thick or better (STC rating of up to 45)
- Solid MDF slab (STC rating 33-50 depending on how it is manufactured). Note: This thing is heavy. It may take 2 men and a boy to lift it, and hold it, in place.
Whichever of these options you choose, it will be significantly heavier than your existing 12 pound hollow core unit. I suggest you order your new door prehung in a frame designed to carry the weight. The unit will come with the appropriate hinges, and it will be drilled for a handle and strike plate. (Unless you have a router, chisel, hole saws, and know how to use them–and want to go to the trouble to prep a slab.) When ordering you will need to know slab size, jamb width, and swing–at least. If you can remove the casing on one side to get the rough opening as well, you will also find out how tight or loose the new frame will be once installed.
Note: In my world, the door swing is always determined by viewing the door from the outside. If the hinges are on your right–it is a right hand swing (like our bathroom door pictured below). Obviously if the hinges are on the left–it is left hand swing (or left hand hung door).
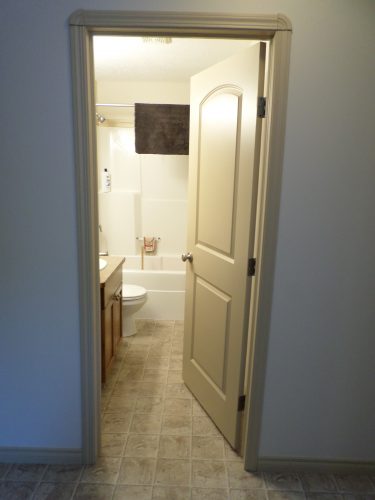 Right Hand Bathroom Door
Once you have the new door, remove the old one and stand the new one in the opening. Use a level (4′ long at least) to plumb the side legs and install a 2 1/2″ or 3″ deck screw through the legs into the framing about 4″ up and down from each corner. Make sure you shim at each hinge location, the strike, and also at least top and bottom on the strike leg. Close the door to check that the edge is flush with the edge of the strike leg. They must be as close as possible to ensure that the rest of your soundproofing efforts will provide a positive result. You do not want to have to make your weatherstrip/soundproofing seal triple thickness in one area, then figure out how to taper it to a single thickness–and still have it seal.
Note: For instance, if the hinge side wall is 3/8″ out of plumb and the strike side is plumb, one corner of the door will be sticking out from the jamb that 3/8″. You will need to remove at least one screw and adjust the frame as required. (Forget the level. It is just for looks anyway.) This is one of the reasons for screws–not nails. (I used nails in the first 2 doors I installed–just before dirt was invented. I would prefer to have my tongue stapled to the floor than ever do that again.)
Once the door fits properly, replace at least one hinge screw in each hinge with a long deck screw that goes into the stud. Add at least one long screw through the shim at the strike location. (You will want to use wood filler on these so make sure they are countersunk.) Install a good soundproofing weatherstrip on the sides and top of the door stop and a sweepon the bottom of the door slab. I would stay away from any rubber finned type of sweep. They will wear down, could leave marks on hardwood or laminate, are difficult to open if adjusted too low, and are almost useless if adjusted too high. Now install the handle and strike. Make sure the strike is adjusted to give a positive seal but not so tight you need to lean on the door to get it to latch.
Sound is like water. It will flow to, and through, any gap or crack. If the door is not sealed properly, the best solid core door will not solve your problems. Install casing on one side of the door frame. Spray low-expansion foam insulation into the cavity against the back of your casing; about 1″ – 1 1/2″ thick. When skinned over, fill the rest of the cavity with ProRox SL 960 Rockwool soundproof insulation or fiberglass. (Note: Do not pack it tight. In this case, more is not better. The tighter it is–the less dead air space. Which means less soundproofing.) Now install casing on the other side of the door frame. Fill all of the screw holes and brad holes–then finish with paint or stain.
If the noises escaping your bathroom door sound like a bad drum solo at full volume, you could consider an acoustic door like those from IAC Acoustics with an STC rating of up to 64. Just be prepared to spend thousands instead of hundreds. You can build an outhouse for less.
Note: I have include a Sound Transmission Class (STC) chart at the end of the article to give you some idea of the real world meaning of the ratings. You can substitute whatever descriptive noun you prefer for ‘speech’ used in the chart. I think that an STC rating of 60 should always be the goal, but it is difficult to achieve that with a door.
Soundproof the Existing Bathroom Door
If you do not want to replace your door slab, you can still quiet things down with a few simple options.
- Add soundproofing weatherstrip. Install self-adhesive weatherstrip to the door stop. (Note: You may have to adjust the door strike to ensure the door fits snuggly to the weatherstrip.)
- Add a door sweep. Not rubber finned. It could tear, leave marks on the floor, or not seal properly to the floor.
- Insulate between the door frame and wall construction. Remove the casing from one side of the door. There should be a half inch cavity with a few cobwebs in it. Spray low expansion foam against the backside of the remaining casing. About 1″ – 1 1/2″ thick. When it has skinned over, fill the rest of the cavity with ProRox SL 960 Rockwool or fiberglass batt. Cut into thin strips for easy installation. Do not pack tight. More does not make for better soundproofing. Just the opposite. Re-install your casing.
Note: If there is no cavity worth talking about, apply acoustic caulking to at least one side. Both sides are better. It just means you will have to remove and replace two sets of casing.
- Hang a soundproofing curtain in front of the inside of the door. With any luck you can train everyone in the house–and visitors–to pull it across the door when using the bathroom. Install the rod at least 6″ above the door, and ensure it is wide enough to cover 6″ on each side (if there is enough room) and touches the floor. You can also use a packing blanket with grommets as a curtain.
- Add mass to the door slab. Attach a moving blanket to the door or a sheet of 5/8″ MDF with Green Glue sandwiched between. Or one or two sheets of 1/2″ or 5/8″ drywall with Green Glue sandwiched between. Although all of these will help keep the sound inside the bathroom, they are low on my list of options. You can only use the Green Glue on a flush (smooth) door. The MDF and drywall are heavy. Make sure that your hinges will handle the weight and add longer screws into the framing on all hinges. There is a lot of finishing to do on the edges of both MDF and drywall. Other than the blanket, you have a lot of work to do. And they all can be ugly.
For more information on soundproofing doors, please see our article How to Soundproof a Door.
Technological Fixes
- White Noise Machines – Instead of, or in addition to, door soundproofing you can buy a noise cancelling machine. The Lectrofan will help cancel most noises made in the bathroom before they get out of the door. Just set it in the room, select the sounds you want, and turn it on. AC or USB powered. (Apparently Alexa can do the same thing, but given that it also might record sounds, it is not my first choice.)
- Sound Masking – Using the bathroom fan to mask noise is also an option. Some of the old ones will mask a plane taking off. The new quieter ones–not so much. If you want to use this option, give some thought to wiring it to the light switch so it will be on whenever the light is on.
Soundproofing a Bathroom Pocket Door
I love these things for saving space. (Every swing door requires around 10 square feet of floor area to open and close. Along with an unimpeded 3 foot wide area of wall to open against.) And they are horrible for sound suppression! Not only do you have a hollow slab sliding on a metal track; there is virtually no way to seal them. And the ‘pocket’ is also excellent for sound transference.
Replacing the Pocket Door
Although it is sometimes impossible because of space limitations; your best option is to replace the thing with a solid core swing door (see Change the Door Slab above for suggestions). If you choose this route, you will probably have to modify the rough opening or order a custom sized door. At the very least you will have to remove the pocket door rails and make the opening of the pocket solid. The easiest way to accomplish this is to rip down a 2 x 4 to fit between the pocket door frame and screw it all together from both sides. 3″ deck screws counter sunk. Now you have a solid substrate you can attach your door frame to.
If you have to widen the opening, use the pocket side, if at all possible. Once you have made it 1″ wider than your new door frame, manufacture a piece of wood to close off the opening and provide a solid framing member. Then install your new door and frame. Make sure you include all of the soundproofing sealing suggested above.
Upgrading the Pocket Door
The quickest and easiest method of adding soundproofing to an existing pocket door is to hang a curtain, or packing blanket with grommets, in front of it. Make sure it extends at least 6″ above the opening, 6″ on each side, and touches the floor. To stop sound getting around the edges you can add Velcro on each side and on the wall. (Although I am not sure your bathroom visitors will have, or take, the time to use it.)
You can also change the door slab to a solid core door. This might entail replacing the track because the door is way heavier than the existing. (You will be going from about 12 pounds to at least 70 pounds–depending on the type of slab.) Changing the track means tearing one side of the wall apart to access the hidden section of the track, then replace the drywall, then mud and tape, then paint. Then find out that you still have to soundproof the top, bottom, and either side. You may have just defined the ‘Law of Diminishing Returns.’ I would stick with curtains.
Soundproofing a Bathroom Accordion Door
You cannot do fix this thing–and why would you want to. Either replace it with a swing door, if you can, or hang a curtain or packing blanket over it. You can use some of the suggestions for soundproofing the frame, but I would not bother. Even if you replace the existing door with a new accordion door, you will see from the picture that there is no viable way to deal with the gaps top and bottom.
Final Thoughts
Sound Transmission Class (STC) Information
Here is a little information on Sound Transmission Class (STC), one of the most used sound rating systems. The following chart from Wikipedia will give you some idea of where your door sound attenuation is, and where you want to get to. For more information on STC, please link to this Wikipedia page. Also, for more detailed information please see our article STC Rating for Doors.

I am determined to have a barndoor in our new very small space. Do you have suggestions for making those a bit less of a sound privacy issue? I like the curtain idea….but other ideas/suggestions might be very helpful.
Thanks
Hi Martha,
You could take a look at the AcousticCurtain by Residential Acoustics. This is a roll-up curtain available in multiple color combinations that can be custom made to your measurements. Assuming that your barn door is proud of the wall, you would have to build out the wall above it to give you clearance, or install it on the other side of the door. They reduce noise by up to 25 decibels. Another option is to attach Mass Loaded Vinyl to the door. STC of 23 and paintable with latex paint. (I am surprised that I did not mention MLV in the article.)
Terry
Very helpful information! We lost our home inside 4 years ago to pipes breaking in the winter….bla bla everyone has something. However we had finally put six panel wooden doors throughout the house. Well, the contractor put all hollow doors in the house and the sound is horrible! You gave some really good alternatives to help this.
We do have a bathroom between the kitchen and living room, and it’s akward if someone has to “GO”. I’ve been looking for ways to make this better and you nailed it!
Thank you!
To address the person about barn doors…Yes I hear you. LOL But even a barn wooden door is better that the amplification of a hollow door my friend…I have both.
Solid wood in my experiance is always best
Hi Heidi,
Good to hear it was helpful. Thanks.
Terry