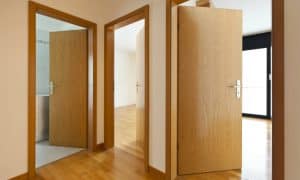
Most interior doors are hollow-core, meaning that there is virtually nothing between the inner and outer skins. There are gaps all around them, and the frames are uninsulated. This means their soundproofing value is pathetic. Following, you will find suggestions that work–to help you fix this problem.
Note: The ‘End Notes’ section of this article is a personal rant about a few ‘fixes’ that do not work, are misleading, and/or stupid. Do not use them.
5 Ways to Soundproof a Hollow Core Door
Although replacing your door slab is the best soundproofing choice (see #5 below), it may not always be an option. You will have to work with what you have. Keep in mind that you are not restricted to one of the suggestions below. For instance, you can use Mass Loaded Vinyl on the door and still add one of the coverings suggested along with the weather stripping and sweep–for even better soundproofing. The following decibel chart will give you some idea of sound levels.
 Decibel Level Comparisons
1) Add Mass and Dampening
Each of the following soundproofing suggestions may involve the use of hooks, glue, or screws for attaching products. If you are renting or have to deal with a condo board, you may need permission before proceeding.
Mass Loaded Vinyl (MLV)
Hang Mass Loaded Vinyl on the inside of the door slab. 1 lb. MLV is 1/8″ thick and will reduce both Airborne Noise and Impact Noise by up to 27 decibels. (2 lb. by as much as 32 decibels.) Unlike acoustic treatments, it works for both incoming and outgoing sounds.
To install, remove your door slab, remove the handle and hinges, cut a piece of MLV to the size of your slab. Lay the MLV on a smooth, flat surface. (A workbench is best, but the floor will also work.) Lightly sand, then wash the slab for better adhesion. Apply contact cement to both the MLV and door slab as per manufacturers instruction. (Rolling, rather than troweling, is a much better choice for the MLV.) Then install the door slab onto the MLV. (This works way better with 2 people because contact cement is fairly unforgiving.) Never try to install the MLV onto the slab. You will fail 10 out of 10 times.
If you are a little concerned about the contact cement, install about 6 screws and washers across the top. MLV can be painted with latex paint. Then cut the MLV out of the hardware hole, and install the handle and hinges, and re-hang the door. Keep in mind that you are adding around 15 pounds to the door slab. It is a good idea to remove at least one short screw from every hinge on the jamb and replace them with a 3″ deck screws for support.
MDF, or Drywall, and Green Glue
Add a layer of MDF or drywall to the inside of your door. For extra soundproofing sandwich Green Glue between the slab and second layer. The Green Glue will work better if you have a flush (smooth) door slab. Green Glue is a damping compound that dissipates sound wave energy by turning it into small amounts of heat. MDF and drywall will add mass to the door.
To install, remove the door slab, hinges, and handle, cut your chosen material to size, apply Green Glue according to manufacturer’s instructions, and use drywall screws to attach to the door slab. Fill screw holes and paint.
Note #1: When cutting either the MDF or drywall, make sure you cut it far enough back from the slab edges to allow room for whatever you plan to use to finish the edges. (Examples: 90 degree wood corners, iron-on veneer edging for MDF, drywall corners, etc.)
Note #2: Do not use any product more than 1/2″ thick. Otherwise, your handle may not fit or operate.
Note #3: Make sure you replace at least one short screw in each jamb side hinge with a 3″ deck screw. You are adding a lot of weight to the door slab and will need the extra support.
Note #4: Your door handle hole is likely 2 1/8″ in diameter but may be different. You will need a hole saw for your drill to add a hole to either MDF or drywall. The best method is to put the product on the slab, then insert the hole saw from the slab side to make sure the holes line up.
Cork Panels
Cork is an excellent soundproofing material. (Please see our article ‘Is Cork Good for Soundproofing? ‘ for much more information.) Sungift 12″ x 12″ x 1/2″ Self-adhesive Cork Boards, although meant for wall hangings, make a great soundproofing addition to your hollow-core door. They are easy to install (on a smooth surface), and easy to cut to size. There is no need to remove the door slab to stick these on. Make sure you wash the door slab with a 50/50 vinegar/water mixture, or TSP, and let dry well before installing. And you can cut out the handle hole with a utility knife.
2) Soundproof Coverings
Soundproof door coverings can be used instead of, or in addition to, door slab treatments. Coverings are quicker, easier, less time-consuming, and, depending on your choice, could be less expensive than attaching something to the door slab.
Soundproof Curtains
- Nicetown Soundproof Curtains will certainly cut down the noise passing through the door. Your curtain should be around 84″ high and wide enough to overlap the wall 6″ on each side. You want it to touch the floor to eliminate sound waves getting under it. You will need a curtain rod long enough to get the curtain right out of the way to make use of the door comfortable. Also, you can use Velcro on each side of the curtain so it will attach to the wall giving it a better seal.
- AcoustiDoor curtains manufactured by Residential Acoustics. These custom-made roll-up curtains will reduce sound levels by up to 30 decibels (which is up to 87% of sound). Attached by hooks installed above the door and with either Velcro or magnetic perimeter seals, they are available in many colors. (Hooks and perimeter seals available when ordering.)
Soundproof Blankets
When you look up soundproof blankets, you will find moving blankets. They are inexpensive compared to some of the other options. But the downside is that they are usually too big or too small for comfortable use on a door. And because most of the doors swing into the room, you are trying to keep quiet; keeping them out of the way can be a problem. The use of curtain holdbacks can solve the problem. Please see our article Soundproof Blankets for Windows to find more blanket options.
- US Cargo Control manufactures an 80″ wide x 96″ high sound blanket with grommets on one 80″ side for hooks.
- Audimute Sound Absorption Sheets manufactures a sound-absorbing blanket that is 54″ wide x 95″ high with grommets on both 54″ sides for hooks.
- Standard Moving Blankets are almost all 72″ wide x 80″ high which tend to be too wide and a little too short. But if you use the Weatherstrip and Sweep suggestions below, they will still be effective.
Note: Realistically, you can hang any blanket or comforter in front of the door to cut down noise. You might want to get a grommet kit if the blankets you are using do not have them.
3) Weatherstrip and Sweep
Not only does sound pass through the door slab, but around the door slab because they do not have a weatherstrip and can have up to a 1 1/2″ gap at the bottom. Make sure these gaps are sealed because wherever air travels, sound travels.
- Weatherstrip. Keliiyo Soundproof Weatherstrip comes in a double roll for a total of 66′ (enough to do 3 single doors). It is a peel and stick self-adhesive product applied to the doorstop. Clean the stop well with vinegar, rubbing alcohol, or TSP to increase adherence. Rinse and dry well. Apply the weatherstrip to both sides and top. (See Note #1 for door strike tip.)
- Door Sweep. Of the many sweep choices, I prefer the Holikme Twin Door Sweep. Fits under the door with a foam sponge on each side–all in a fabric covering. No need to screw or glue it to the door slab. You may want to cut the door stop side a little shorter to ensure it fits between the stops and does not bind when closed. (See Note #2 for tip with rug flooring.)
Note #1: If your door does not latch because of the extra thickness, you will have to move the strike. You will probably only move it about 1/8″. To eliminate the frustration of the screws going back into the existing holes, mix up a little wood glue with sawdust, pack it into the old holes, let dry, drill new holes where you need them, and install your strike.
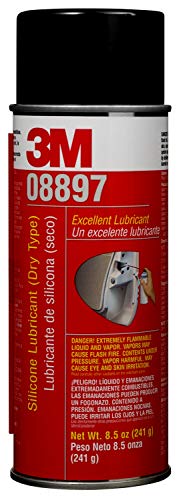
Note #2: If your door sweep is not sliding smoothly over rug, remove it and spray the entire underside with dry Silicone Lubricant, let dry, and re-install. Silicone will not stain the rug. (You may have to repeat the treatment yearly.)
4) Sealing and Insulating
To seal the cavity between the door jamb and wall framing, remove the casing from one side of the door, spray about 1″ of spray foam against the backside of the remaining casing, let dry, fill balance of cavity with Roxul 80 Soundproofing insulation or fiberglass batt, re-install casing, and use Red Devil caulkingto seal the casing on both sides to wall and door frame. (Do not pack insulation tight. In this case, more is not better.) Along with weatherstrip and door sweep, all of the gaps around your door should now be sealed.
Note: If your caulking bead is not perfect, you can buy a magic tool to smooth it out–or you can just lick your finger and run it down the bead. I have used up over 1000 tubes of caulking, and a wet finger has always worked. Besides, you always have one handy.
5) Change the Door Slab
Changing the door slab to a solid core or solid wood unit is the best option. It adds mass and thickness because most hollow core slabs are 1 3/8″ thick, and most solid slabs are 1 3/4″ thick. (This option may not be available if you are renting, live in an apartment or condo.) I would order my door prehung so the slab fits the frame, and the frame is strong enough to accommodate the weight of a heavier slab. It also saves you from routering or chiseling out hinges and drilling holes for the handle and strike. When ordering the door, you need 3 measurements–width and height of existing slab and wall thickness. And door swing. Standing on the outside of the door, which side has hinges, and does it swing in or out. My bathroom door (pictured below) is a right-hand inswing.
Install your new door square, plumb, and level. Replace at least one jamb screw in each hinge with a 3″ deck screw that reaches into the framing to hold the weight of the door. I would also use a long screw at the strike to prevent jamb damage if you have door slammers in the house. Complete your soundproofing installation with the weatherstrip, sweep, and sealing suggestions above.
Note: Another new door option is to install an exterior door c/w frame, compression weatherstrip, and sweep. If you do not mind, the raised sill that comes with the unit. It will be a tripping hazard.
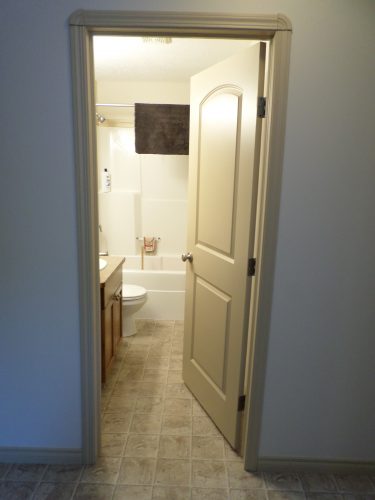 Right-Hand Bathroom Door
End Notes
While getting ready to write this article, I looked at a few other sites offering advice on soundproofing hollow core doors. A few of them have the exact same bad advice using virtually the exact same words. And some of it does not work.
- Inject foam between the panels. Good luck. Most doors have a honeycomb of cardboard to prevent them from becoming concave. And some of them have wood spacers for the same reason. You cannot get foam uniformly into the whole unit. And if you do manage and use the wrong foam, your door can end up looking pregnant–if the foam does not, just rip the skin right off.
- Remove the skin from one side, insert soundproofing material, and re-attach with Green Glue. It should be finished in 30 minutes. Absolutely correct–when a herd of pigs flies over your house. You’ll be lucky to get the skin off undamaged in half an hour. And Green Glue is not an adhesive.
- Place heavy sound-absorbing furniture close to the door. How close can you put it and still get in and out? May absorb a little outgoing sound on its way to the door but will do nothing for incoming.
End of rant.