The noises you hear coming from your stairs are almost invariably, squeaks. Over time wood dries out and nails loosen up. Most squeaks can be silenced. Some repairs are a little more difficult to make than others–mostly because of access–or lack of access–to parts of the stairs. Or there is a rug on the stairs.
Here are a few tips, tricks, and shortcuts that can have your steps sounding less like a haunted house and more like–nothing.
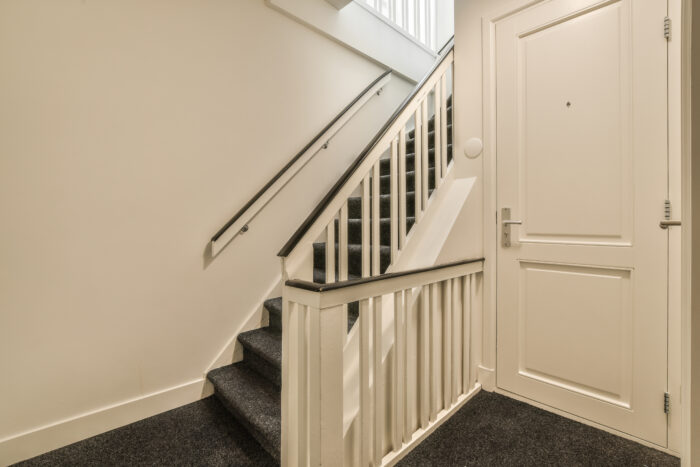 Design of stairs in a modern house
6 DIY Ways to Make Your Stairs Quieter
Well-made solid wood stairs can be beautiful, But they can also be noisy. Stairs covered with carpet should be quieter–if only because carpet reduces footfall noise.
1) Screw the Treads to the Risers And Stringer
The part of the stair most likely to be loose and squeak is the tread. Especially the leading edge (front) of the step, which gets most of the traffic, weight, and pressure from almost every footstep. All treads should be nailed, screwed, or glued to the riser below. (Risers are the vertical pieces installed at the back of each step.)
Stringers are the side pieces of your stair assembly. Stair treads sit on–and are fastened to–the flat part (called the run) of stringers. Risers are attached to the vertical part of the stringer (not surprisingly called the rise). Generally, the rise is installed first. Then the tread is attached to the stringers. The rise is then nailed or screwed to the back of the tread and the nose of each tread is nailed or screwed to the rise below it.
Some, or all, of this can come loose over time. If a gap has appeared between the tread and top of the riser, try to squeeze a little glue into the gap before screwing it back together. Predrill 2 holes at each end of the treads and 3 holes along the front. Make sure you countersink them to bury the screw head, I would use 2 1/2″ deck screws and a variable speed impact drill.
Get as much weight on the tread as possible while you are screwing it down. Warped 40-year-old dry fir will not take kindly to being straightened out. Fill the screw holes with good wood filler and finish to match the existing ones.
If you can’t straighten the tread, you have 2 options.
- Cut a 2″ x 2″ x 12″ long block. Fit it under the stair tread in the center of the riser. Glue it and screw it to both the riser and tread to prevent any movement or noise.
- Replace the entire tread. I would only do this if it is also cracked, split, or really worn down in addition to being warped and noisy.
2) Lubricate Friction Points
Yes, you can lubricate wood, Just don’t use anything oil-based. Quite often treads and risers are made of 2 pieces of wood each, Over time the wood will shrink, creating gaps or cracks between pieces, Sometimes they shrink enough to keep from touching. Most times not.
Lubricate any cracks you find with powdered graphite, talcum powder, or dry spray silicone lubricant. The boards will still rub together, but each of these products will make it silent. If you decide on using a powder, make sure you have a cloth or flat implement, such as a small putty knife, to force as much product into the crack as possible.
All of these products are very slick. Any excess left on stair treads will make your steps very slippery. Both of the powdered products will eventually work their way out of the crack and can be tracked all over the house. (Use white graphite instead of black. You will still track it around, but it leaves a less noticeable mess.) Silicone will probably have to be re-applied yearly.
3) Tighten the Stringers
Stringers are the equivalent of floor trusses. They are the heavy-duty framing that supports the entire stair system. Quite often almost everything is attached to them–treads, risers, newel posts, sometimes even railing and spindles. Occasionally they can become loose. Houses shift and settle. Wood dries and twists. And don’t forget the tons of weight that uses the stairs every year.
Most ground-floor to second-floor stairs are set against one or two walls for design efficiency and stability. Basement stairs are quite often a different design. Stringers will be attached to a landing on the main floor and the stairs will be set on the basement floor with no other support.
Securing, or re-securing stringers to walls is usually fairly easy. Find the studs and add one 3 1/2″ nail and one 3 1/2″ deck screw in each location. Predrill, and countersink both to make filling and refinishing easier. (If you have access to the underside of your steps and they are not finished, do your re-attaching there.)
Note: The reason for the screw and nail program is that the screw will pull the stringer tight to the framing, but has less shear strength than a nail. The nails provide shear strength to prevent vertical movement. I would feel comfortable using all screws, but feel you should know.
Basement stairs and unattached main floor stairs may flex up and down. Any movement can loosen nails and glue–even screws. Fixing a support that is attached to the center point of both stringers and sitting on the floor will eliminate any flex in your stairs. If it is an open stair on the main floor, you can make it quite attractive by using turned newel posts as supports.
4) Tighten Railing and Posts
Newel posts can get loose, wobbly, and noisy. Or railing attached to the wall can become loose. Quite often this is caused by a generation or two of munchkins swinging on them or hanging from them. Actually, the problems begin with questionable construction practices, and in some cases, cheap product. Not only are loose railings noisy, they can be very dangerous.
Handrail brackets must be screwed into studs–as close to center as possible. (You cannot safely attach handrails to the wall with screws into drywall with those little plastic spreaders, and expect them to hold.) Any, or all, of the screws that fasten the brackets to railing or wall can become loose. Loose railings clunk, bang, and rattle.
A loose newel post eventually leads to loose handrails and balusters (stair pickets). If installed correctly, newel posts should never become loose. Cut a hole in the floor and extend the post to the bottom of the floor joists. If you have to, install a cross brace between 2 joists, and attach the newel post to it–securely.
Once the newel posts are secure, move on to the handrail and balusters. Make sure that all parts are secure and tight. Not much point in good solid posts and having the handrail fall out.
Note: It might be a good time to add a few balusters if your railing system does not meet code. Balusters are supposed to be no more than 4″ apart on center. That is meant to keep even the smallest heads from fitting between.
5) Add Support to Treads
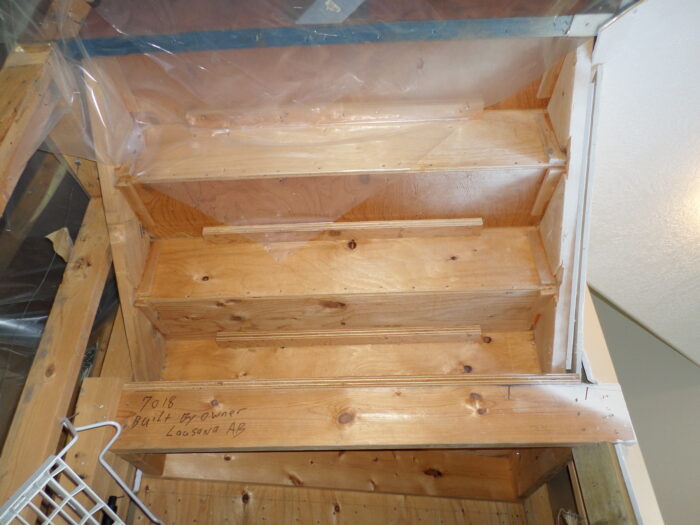 Nose of Tread Supported From Below
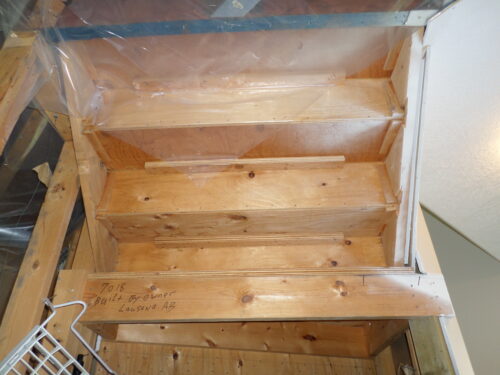
Your stairs may be old and ugly and hard to fix because of the way they were built. No sawtooth stringers; just two 2 x 8, 2 x 10, or 2 x 12 planks for stringers with the treads nailed in place from the outside. Probably no risers either. These things usually squeak, creak, and tremble. To fix this, cut one 1 1/2″ block for each tread–the width of the tread and the same height. Then cut them all diagonally to form 2 triangular support pieces–one for each end. Screw or nail one piece under the ends of each tread.
For extra support design a riser that fits between the back of each step and the nose of the next step. Screw them in place, Not only will they close off the rear of each tread, they will make the stair more solid and less noisy.
6) Seal Tread Gaps
Treads can be gapped in many different locations. Between the tread and the lower riser. Between the tread and rear riser. Between the tread and stringer. And, of course, the tread could be cracked.
In the lubrication section I talked about adding lube to gaps and cracks in treads. Another option–if you can stiffen the treads and stairs enough–is to glue those cracks together with a good wood glue (I prefer Weldbond). Your glue should be sandable, paintable, stainable, and give you about 10 minutes working time before it skins over.
Use a small putty knife, a glazing bar, or flat head screw driver to force the glue all the way down into the crack. Start at one end and work your way to the other, forcing out as much air as possible. Once the glue has hardened, you may need a little more as a top dressing to make the patch flush with the top of the tread. If not, just sand it, and finish it to match.
If the gap in your tread is there because two boards were used, instead of one, screw a full length 1 x 4 across the bottom of the gap. Pairs of deck screws about every 4 inches. Fill the gap with a very good caulking. Not silicone. (My choice would be Supra window and siding caulking. because it expands and contracts 1400% and is paintable.) Layer it into the gap, let it dry, add another layer. Smooth down the last layer and finish to match.
Other Ways to Make Stairs Quieter
The following stair repairs are a little more involved and expensive.
Replace Treads and/or Risers
The staircase in my childhood home was like a piece of art. Built in 1916, out of clear fir, and waxed regularly, it has supported generations of feet. You may have a similar staircase. All those feet and all those years take a toll on even the toughest wood. Tearing out the entire stair case and replacing it is probably the simplest solution–although expensive. If you are willing to be haunted by generations past.
Sometimes the treads get so worn they can be a hazard. One option is to replace the entire thing. Before hauling out the sawzall, make a thorough inspection of the entire stair system to get an idea of how they were constructed. For instance, many of those old staircase treads were dadoed into the stringers. Meaning that when you start cutting them out, you will likely lose the risers, too–and have to replace them.
Because of the many different types and styles of stairs, it is almost impossible to make valid “How To” suggestions. Probably the most valuable advice is to take your time and enjoy your accomplishment. If you are contemplating this course of action, I can only assume that you have the know-how and tools to make it happen.
Double the Tread Thickness
If your stair treads are thinning out and maybe getting a little spongy, you may want to double them up. Instead of replacing the entire tread and riser, give some consideration to adding a 1/2″ or 3/4″ layer of wood on top of the existing tread. Making the tread thicker will eliminate flex and squeaking.
Clean each step as you work on it. Apply a floor leveling product to the tread. (Make sure that it will accept glue or contact cement,) Cut your new piece to fit as tight as possible, Make sure the nosings are flush. Use glue or contact cement and a few screws to hold it down Install a new stair nosing that covers both the old stair and the new stair.
Seal the joints between the new tread and the riser and stringers with paintable/stainable caulking. Finish to match the existing. You should end up with a solid quiet stir case.
Note: Use solid wood. Plywood is less expensive and easy to work with. But the veneer will eventually wear off leaving you with a refinishing problem.
Install Carpet & Underlay
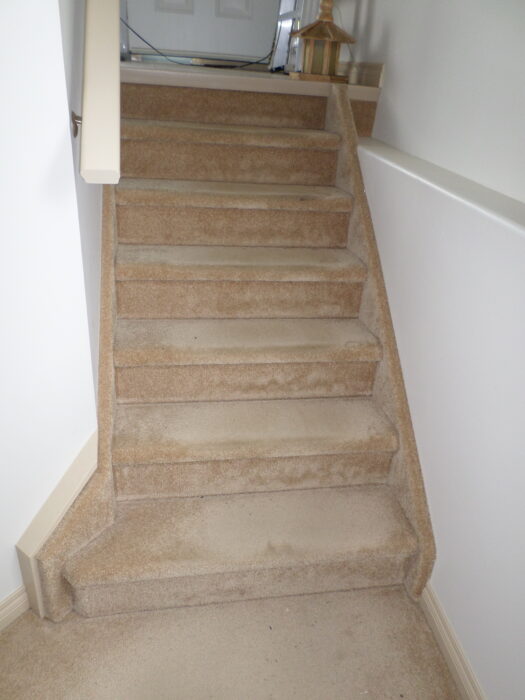 Carpeted Treads, Risers, and Stringers
Sometimes the stair noise is not squeaking but the thunder of your teenagers racing up and down. (Maybe tempting you to spray the treads with silicone in an effort to make them slow down.) Or the center of the treads are wearing down and squeaking and cracking.
Give some consideration to carpeting the stairs. Carpet has quite a few advantages. You can nail, screw, caulk, and seal without worrying about refinishing. The carpet should cover it. You can only carpet the center 2 feet of the stairs; leaving original wood exposed close to the stringers. Or you can install carpet on the entire tread, riser, and even the stringers. Carpeting will quiet any residual squeaking and the thundering of feet.
Thick wool carpet is your best choice for soundproofing. Just make sure that the nap is not too long. Short carpet can make it safer to go up and down stairs. But long, slick carpet fibers–like nylon–make stairs more dangerous. Especially for the young and old.
Get a Professional Opinion
Most of us would like to convince ourselves that we can be pretty good at whatever we try. Quite often we are self-delusional. (I changed the oil pump in a D8 Cat once. That in no way makes me a heavy-duty mechanic.) Building a couple of steps for a deck does not qualify someone to tear apart and rebuild a staircase.
If you are not quite certain of your abilities, or what needs to be done to quiet your stairs, get a professional to look at what you want done–or think you want done. The professionals I suggest include:
- Stair Construction Companies. Most staircases are constructed off-site. And you probably do not need a new one. But all of these companies have installers working for them, or will know someone they would trust. This should be your first phone call.
- Finishing Carpenters. A good finishing carpenter usually can come as close as possible to making a silk purse out of a sow’s ear. Their job is to fix, or hide, everyone else’s mistakes. Most of them are very good.
- Restoration Carpenters. I do not mean fire and flood people; but someone like a furniture restorer for those 100-year-old staircases.
Once you start, you should be able to finish. Calling for help part way through will only cost more money.

I recently made some updates to my stairs to reduce the noise they were making and it has made such a difference! The house feels so much more peaceful and I can’t believe how easy it was to make such a noticeable improvement. If you’re struggling with loud stairs, I highly recommend giving some simple fixes a try.