Strut mounts not only secure the struts to the vehicle chassis, they are designed to provide a sound dampening effect between the moving parts under the vehicle and the passenger cabin. When they start making noise, every sound is amplified inside. Hopefully, one of our suggestions will solve your problems.

4 Noisy Strut Mount Fixes
Noises coming from a failing strut mount have been described as clunking, knocking, creaking, and grinding. These are usually more obvious when hitting potholes or speed bumps, driving on rough ground, or driving at low speeds while turning the wheels all the way to the stops.

1) Lubrication
There are not many lubrication points on a strut mount, but there are a couple of things you can do to reduce noise.
Binding Strut Spring
As strut springs compress, they also rotate slightly on the spring seat insulator (yellow ring on right side of above strut picture). Coil springs act differently than many other springs. They do not just operate in a straight line. If the seat is not lubricated, specially once it gets worn down, the spring will jerk and/or clunk as it rotates.
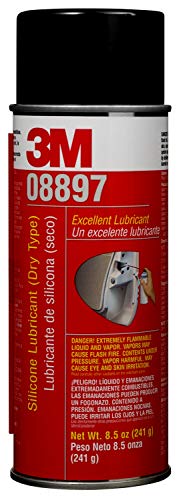
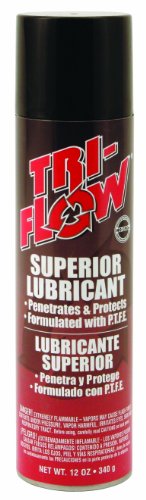
Jack the vehicle up and remove the wheel. Spray (soak) the spring seat insulator and the top of the spring liberally with dry silicone spray or Tri-Flow Superior Lubricant. Also the bottom of the spring even though it really does not move much. (You have the tire off and are in there anyway.) Allow 24 hours to dry. Replace the wheel and you should be on your way.
Note #1: Do not get any lubricant on your rotors. This stuff is as slick as goose poop, which could make stopping an adventure.
Note #2: Do not use WD-40. It will do nothing good for your coil springs. It is a water-displacing product–not a lubricant.
I have seen recommendations to spray the bearing. Don’t do that. All you will accomplish is the dilution of the bearing grease, causing the bearing to wear out even faster. If your bearings are the source of the noise, you will probably have to replace them.
Rubber Vibration Insulator
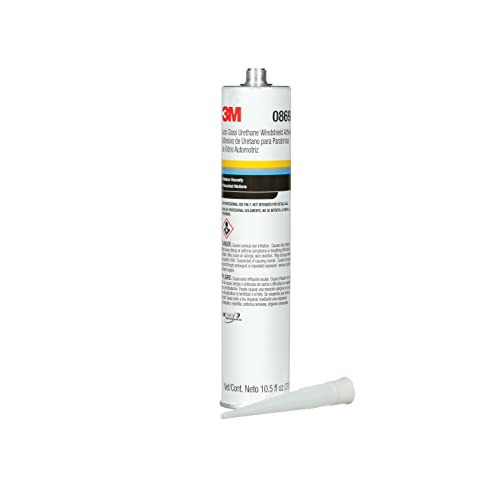
The rubber vibration insulator is the filling between the two metal plates of the strut mount. It provides the sound dampening effect. The clunking noise you hear could be caused by the metal plates separating from the rubber. So the strut sounds like it is ‘bottoming out’ when one part hits the other. One of the best options to fix this problem is to pack Urethane Windshield Adhesive between the rubber and metal plates. Fill both sides. (Pack as much into the cavities as possible.) The Urethane dries to a hard rubbery consistency in 24 – 48 hours; essentially re-building the vibration insulator.
To do this properly, you will have to remove the strut to work on it. There is just no other way to access the entire circumference of the insulator. And ideally, you want the same amount of Urethane all around.
Note: If the clunking sound you hear is metal to metal contact, you will be replacing the strut mount. The rubber has disintegrated, and there is no way to replace just that part.
Another possible option is to tighten the shock mounting nut in the center of your strut mount. This may make up the slack in the compressed rubber. Do not tighten more than a third of a rotation. If a third does not do the trick, you will have to choose a different option. Anything more than a third can possibly cause more problems.
2) Mechanical Fixes
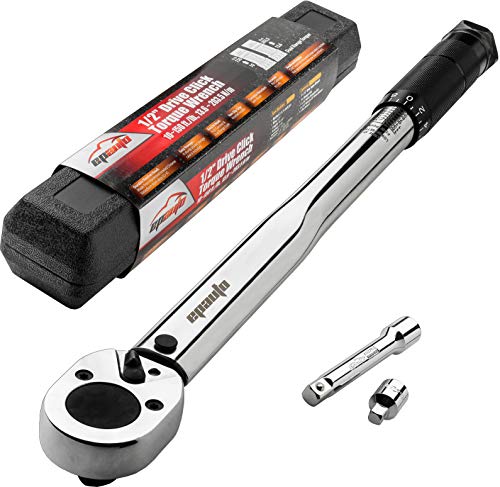
Struts and strut mounts are self-contained units. There are very few adjustments you can make. But you should pay some attention to what you can control. Which is really good maintenance. If you do not own a decent torque wrench, you will need to get one. Most of the fittings you will be dealing with–whether just maintenance or full replacement–need to be tightened a specific amount to hold, and work, properly. Most of the time, tighter is not better. You will only stretch the bolt, disfigure the threads, or worst of all, break something.
Strut Mounting Nuts
Most strut mounts have 3 bolts, or threaded studs, for mounting to the chassis of the vehicle. Occasionally, one or more of the nuts holding the strut mount will come loose. If it happens to all of them, you are going to have even more clunking sounds as the entire strut bangs against the chassis. This could wear threads off the nut, or if loose enough, the stud could start coming out of the mount causing even more noise. The nuts are usually easily accessible. So checking them should be no problem. Depending on the make of your vehicle they are usually torqued to between 21 and 35 foot pounds. You should be able to find the exact amount of torque required in your owners manual or from the manufacturer’s website.
Note: If I found one of them had come loose, I would probably invest in the proper size nylon locking nuts and replace all of them. If one has come loose, the others may not be far behind. Remove each nut one at a time and install the new nut tightened to the proper torque. Done properly, this should eliminate the problem. But check them every once in a while anyway. I do not trust that anything is ‘forever’.

Shock Mounting Nut
As with the strut mounting nuts, the chance of this nut coming loose is also very low, but it is certainly worth checking. Anything that is not tight will cause noise, wear out more quickly, or break.
The shock absorber part of your strut is bolted into the center of the mount. It is held in place with one nut on the end of the shaft. As with the mounting nuts, you will need a torque wrench. (The required foot pounds of torque will be significantly more than that required for the mounting nuts. Check your owners manual or manufacturer’s website.)
You are going to need 2 different wrenches to accomplish this–one on the shaft to keep it from turning and one to tighten the nut. Do not give in to any urge to slap a vice grip on the shock. You will hate yourself almost instantly. Another option is to buy, or rent, a shock absorber strut nut kit. This is what they are made for and your life should be much easier.

3) Bearing Replacement
Replacing only the bearings is possible in a lot of strut mounts. But I am not sure why you would only replace the bearing. Generally the entire strut has to be removed to accomplish bearing replacement. If you have the whole thing out of there, why not just replace the complete mount. Then you have a completely new unit–bearing and all–usually for less than $75.00 each. Saves worrying about something else going wrong later. And having to pull the whole thing apart again.
4) Strut Mount Replacement
Once you are certain that the strut mount is causing your noise, and an inspection tells you that it cannot be repaired, you will have to replace the thing. It is not necessary that you do both at the same time, but I would. You already have the tools out, you are probably dirty, and what could be better than spending a day changing strut mounts and practicing your cussing.
Depending on your ability, and the availability of needed tools, strut mount replacement can take between 1 and 4 hours-each. Because it involves removing the complete strut assembly, replacing the mount, then re-installing the strut. Again, your closest friend will be the owners manual and/or the manufacturers website for parts, diagrams, torque numbers. And maybe YouTube.
Also, common sense. I had 2 uncles, with a grade one education between them, who could pull apart any piece of equipment on the farm, then put it back together again. First piece they removed went to the farthest corner of the shop in line with where it came from. Next piece beside it. Etcetera. Put things back together in reverse order. Never failed to work.
Jack up the vehicle, block it to make sure it is stable, and remove the wheel to access your strut. Depending on the vehicle, you may have to disconnect tie rods and other components (like brake lines) from the strut. I would remove both nuts from the bolts attaching the strut to the knuckle along with one bolt. (Leaving the second bolt in place will keep the strut from falling on the concrete when you remove the 3 mount nuts in the engine compartment.) Remove the mount nuts, then the last knuckle bolt and pull out the strut.
Note: The knuckle bolts were put on with around 115 foot pounds of torque, then you drove 100,000 miles through mud, snow, and car washes so you are going to need a socket with a strongarm (breaker bar?) to get them loose. Along with Liquid Wrench aerosol penetrating oil.
Clamp the strut into a bench vice (if you have one) for ease and safety. You will need coil spring compression clamps (with safety locking pins) to take the pressure off the springs. Once the pressure is off the springs, remove the nut at the top of the shock absorber and take off the old strut mount. (If you do not have the necessary tools, you can buy a shock absorber strut nut kit.) Install the new strut mount to manufacturer’s instructions.
Now it is just a matter of putting everything back together in reverse order. (Just like those two old farmers.) Make sure you torque all of the nuts (including lug nuts) the required amounts. If you have never done this before (I haven’t, but feel pretty confident I can.), take your time, think it through, and above all, do it safely. (If those springs get loose, they can do a lot of damage.)


Strut Mount Information
A strut mount is exactly what it sounds like. The upper end of the strut assembly (right hand side of photo) that attaches to the vehicle chassis. But don’t sell it short. It is not anywhere near the same type of ‘mount’ as your license plate mount. It is a complicated combination of bearings, rubber, and mounting plates connecting your suspension and steering systems to the main body of the vehicle. Strut mounts are a critical component of your suspension system; if they are damaged, that system will not perform properly.
Strut Mounts Provide Quiet Rides
The strut mount is kind of like a sandwich–with metal plates for bread and rubber-like bushing (insulation) as a filling. It cushions the impact of bumps, potholes, and small road kill–reducing the noise and vibration and jolts transmitted to the vehicle by providing a sound dampening effect between all the moving parts under the vehicle and the passenger cabin. When working properly, a lot of road noise stays under the vehicle.
Are Noisy Strut Mounts Dangerous?
The noise itself is not dangerous–obviously–but quite likely it is an indication of something going wrong. A good strut mount/bearing provides a sound dampening effect ensuring that suspension noise and vibrations are not transmitted into the vehicle body. They are designed to last the lifetime of your vehicle without lubrication or maintenance, but as we all know, stuff happens. A noisy bearing is like a constant pain in your knee; an indication that something is going wrong.
Strut mount bearings are kind of important. They act as steering pivots which affects smoothness and response of vehicle. A defective strut mount bearing can increase braking distances, impact steering and driving, cause tracking problems, and make your tires wear quicker on one side (increasing the chance of a blowout). So if the noise is a bearing, it is time to change the strut mount. (Note: I would probably do both at the same time to keep them consistent.)
End Notes
Before performing any work on your strut mounts, make sure you are comfortable with removing, and replacing, parts that are important to the safety and comfort of your vehicle’s operation. If you are not, then take it to a professional. Yes, it costs more. But done properly, and safely, is way more important than saving money now, only to spend more later to get it done right.
Personal Note: Years ago I did all of the maintenance on our vehicles, including a D-8 Cat. With today’s vehicles, I just hope I can get the windshield washer fluid in the right place.

A superb, well conceived and carefully thought out story on precisely what I asked for.
Deepest, sincerest thanks for your wisdom, English skills and time.
Tell me when I may do something for you?
Hi Gordon,
Thanks for the kind words.
Terry
Hi Gordon, I have a 2002 Lexus ES300, I’ve had a clunk when hitting low spots in the road or traveling over rough roads. I’ve replaced every suspension part on the car, sway bar links, axles, struts, mounts, rotors breaks, boots, etc. and the clunk is still there, any suggestions?
My 1996 Monte Carlo rear strut mounts are clacking away over ever bump in the road so now I know how they function and what there wear indicator is via noise and handling thanks to your insightful article here, Terry.
Thanks for that lecture.
It is helpful.
Cheers, Robert
Hi Robert,
Good to hear it was helpful.
Terry
Sharing out all that wealth of practical knowledge and experience is so very thoughtful, caring and indeed selfless. Thank you for being such a help. I now have the answers to all the troubling suspension noises and effects that I have grappled with for a long time.
Be blessed, sir.
Thank you for the kind words.
Terry