
Building a room-within-a-room is the ultimate method of room soundproofing. It is the principle used in the construction of most major studios. So, whether you have a music studio, a home theater, or just want a quiet, quiet room–here is what you need to know to do it properly.
Note: Room-within-a-room construction is also used to isolate heavy industrial equipment noise. Which, I am fairly certain, is not your reason for reading this article.
Reasons to Build a Room-Within-a-Room
Reducing incoming, or outgoing, noise in your home, or in a particular room can be accomplished in many ways using many different materials from sound-absorbing blankets to double drywall and more. All of the suggestions we make will work–to a greater, or lesser extent. But a room-within-a-room truly addresses all soundproofing elements–mass, absorption, decoupling, damping, and sealing.
- Equipment Isolation. Most equipment requiring isolation in a home is related to music or recording. But occasionally, you or your neighbor could be renovating, or have a hobby that uses high decibel equipment. Such as air compressors and associated tools, electric saws, hammers, among others.
- Recording Studios. If you use the space for making, and/or recording, music loudly; or you neighbor’s idea of music produces invasive loud noises–this is definitely the way to go.
- Home Theaters. Most people have a home theater to experience the full effects of concerts and movies. Many theater sound systems could rival those in movie houses.
- Your Peace and Quiet. If you are the person who cannot sleep if there is any type of noise in your space, then you will want to at least look at building a room-within-a-room.
Room-Within-a-Room Considerations
There are 2 main things to consider when contemplating building a room-within-a-room:
- How quiet does the room need to be? The answer to this question usually hinges on your use of the room, or what kind of racket your neighbor is creating, or sometimes both. A home theater on either side of the wall, exterior noise like trains or traffic, constant foot traffic in the suite above, how much time you spend in the room. Do you experience constant noise? Or only occasional noise that you can generally live with.
- Can I afford it? If you need to hire a contractor to build your room-within-a-room you are going to need fairly deep pockets and long arms. A cost of $30.00 per square foot of surface area is not out of the question. (For example: a 12′ x 12′ room with 8′ walls, could cost approximately $20,000.00 for a contractor-built room.) If you have the time, ability, and equipment, you can reduce the cost significantly, and still achieve your dream room.
Note: Before making a final decision, remember that you are going to lose floor space and height. A new 6″ wall in your 12′ x 12′ room will subtract approximately 24 square feet, or 17% of the floor area. Your wall height will also be reduced by at least one foot.
What Your Room-Within-a-Room Will Accomplish
You have 3 types of noise to deal with–Airborne Noise, Impact Noise, Flanking Noise.
- Airborne Noise – Sound transmitted through the air such as TV, radio, speech, barking dogs. See Designing Buildings Wiki-Airborne Sound for more details.
- Impact Noise – (Sometimes called Footfall Noise) Sound transmitted through a structure created by an object striking another surface such as someone walking across the floor. See Designing Buildings Wiki – Impact Sound for more details.
- Flanking Noise – Sound transmitted between spaces indirectly such as furnace noise through air ducts. See Designing Buildings Wiki – Flanking Sound for more details.
Building a room-within-a-room addresses all of these because it adds mass and absorption, isolates the ‘new’ room, decouples the framing members, and seals penetrations and gaps.
Do-It-Yourself Room-Within-a-Room
If you have decided to do the work yourself, I am going to assume that you have the ability, knowledge, time, and tools to get the job done. (Or friends and family who can provide what you may be lacking.) So, I am not going to explain ’12” on center’, ‘plumb’, or ‘hold the pointy end of the nail against the wood and hit the flat part’. If you have doubts about successfully completing the project, look for a good contractor–preferably one with soundproofing experience.
Floor Soundproofing
If your room is in the basement on concrete, there should only be some Flanking Noise travelling through the concrete and wall framing members attached to it. By installing QuietWalk Plus underlayment directly on the concrete before putting down your finished floor, you will reduce flanking noise. The QuietWalk is specific for laminates, hardwood, LVL but I also like it for rug (specially on concrete) because of the built-in vapor barrier. One edge has tape for joining the sections, but I would use underlayment tape over each join just to be safe. (Nice to have tape handy if you tear the product during installation.)
Floating Floor
A floating floor is the answer for rooms in condos, apartments, or the second floor of your house. (It can also be used over concrete although I would install QuietWalk Plus first because it provides a vapor barrier.) Set your 2 x 4 joists on Auralex Acoustics U-boat Floor Floaters to decouple the floating floor from the main framing. Space them 12″ apart around the room perimeter to provide support for the new walls. (Lack of support under the walls could cause the floor to crown in the middle because of the perimeter weight.) If you are concerned about a spongy floor, set the 2 x 4 at 12″ on center or use 2 x 6. The U-boat Floaters will also reduce structural vibrations. (Think bass sounds.) Vibration is not a sound wave frequency.
If you have in-floor vents, you will have to extend them to reach the top of the new floor. And while you have it all open, wrap as much pipe as possible with Frost King Duct Wrap. (Note: You should have Duct Tape handy to hold it in place.) Seal any gaps and cracks with acoustic caulking. For anything over 1/4″ you may have to use a combination of spray foam, Duct Wrap, batt insulation, and acoustic caulking to get the opening sealed.
Install Roxul 80 sound absorbing rockwool insulation between joists; then glue and screw 3/4″ plywood sheathing onto the joists. The plywood allows you to put down any type of flooring including nail-down hardwood.
Wall Soundproofing
You can build your new walls without taking down existing drywall. Using this method is less expensive and takes less time. But it does not allow for extra soundproofing insulation in the existing walls. Also, it is very difficult to properly extend electrical and HVAC systems into the new wall. If you are going to get the best result from your room-within-a-room, plan on getting rid of existing drywall.
Note: Whichever option you choose, make sure you seal the sill plate of the existing wall to the floor with acoustic caulking.
Once you have the room back to open studs, or if it started life that way, you can install ProRox SL 960 Rockwool soundproofing rockwool, then start framing your ‘room within a room’. Deeper, or thicker, walls contain more air volume and are better at isolating low frequencies (your greatest sound enemy). Snap a chalk line on the floor 5″ inside the existing framing. This is the inside of your new 2 x 4 stud wall leaving a 1 1/2″ space between walls. Frame it plumb to the height you require to allow for new ceiling joists (see Ceiling Soundproofing below). Don’t forget to extend the electrical boxes. (Note: Work to local electrical codes. Just adding a couple of wires into the new box doesn’t quite cut it.) Once you have insulated the new wall with Roxul 80, you can drywall and finish. Following are 3 drywall options to consider:
- 5/8″ Acoustic Drywall (Quiet Rock or Certainteed Silent FX) has a viscoelastic polymer sandwiched between dense gypsum drywall. Probably a little more expensive than double drywall and Green Glue but it is a ‘one-step’ installation.
- Double 5/8″ drywall with Green Glue damping compound sandwiched between
- Single 5/8″ drywall over 3/4″ plywood with Green Glue damping compound sandwiched between. Still provides excellent mass, plus it gives you the ability to attach anything to the wall anywhere, without looking for studs. This is my choice because the studs are never where I want them.

For both options #2 and #3–after installing the first layer, use acoustic caulking to fill any obvious gaps. (You can also tape and mud the first layer of drywall if you like–to close the gaps. Might be a little much.) Spread Green Glue on the backs of the next layer of drywall (according to manufacturer’s instructions) and install over the first layer. Make sure the joints do not line up with those of the first layer. Tape and mud drywall, and paint. Install and seal your baseboard, and window and door casing–after soundproofing them.
Note: If you purchase Green Glue in 5 gallon pails, you will also have to get a Green Glue applicator.
Note: Make sure all of the HVAC and electrical sealing and extensions are done to code before closing up the wall. And every gap is sealed.
Ceiling Soundproofing
Once the drywall is off your ceiling, you can treat it like the walls. Insulate between the joists with ProRox SL 960 Rockwool soundproofing rockwool. (Because gravity works, you may want to staple duct support straps under the insulation every couple of feet.) For a true ‘room within a room’ the new ceiling must not be attached to the existing ceiling. To achieve this, construct the walls at least 7 inches short of the existing ceiling. (This should give you at least 1 1/2″ space between ceilings.) Then place 2 x 6 lumber on edge at 12″ on center on top of the walls. Attach them to the wall top plates with 3″ deck screws installed from the bottom of the plate. (This is probably way over designed and built, but better than having the ceiling in your lap one evening.)
Note: This configuration will span 16′ with minimal deflection (sag) when drywall is attached. To figure out maximum span with whatever type of wood you plan to use, go to American Wood Council Span Calculator, fill in the form, and get an instant answer. (I would not use anything smaller than a 2 x 6 regardless of what the span calculator says is acceptable. 2 x 4 can warp easily.) This is not a load bearing structure. No one is walking on it. It is only there to attach drywall and provide soundproofing.
Note: You may have longer spans if the room is bigger. In that case, you will likely have to use bigger joists like 2 x 8, or 2 x 10. As long as you don’t mind lower ceilings. Make sure you build your walls to the proper height to accommodate bigger lumber.
Insulate between the new joists with ProRox SL 960 Rockwool. (Don’t forget to extend any electrical boxes, allowing for the drywall thickness. And wrap with putty pads.) Finish the ceiling with whatever drywall soundproofing choice you have made for the walls. (Again, I prefer option #3. I do not know what acoustic treatments or electrical equipment you plan to hang from the ceiling, but the 3/4″ plywood backing allows way more flexibility.) Tape and mud drywall, and paint.
Note: Make sure all of the HVAC and electrical sealing and extensions are done to code before closing up the ceiling.
Window Soundproofing
If you have a window in the room, I strongly suggest you just close it in and treat it as part of the wall. Really! But if you are going to leave it, and are spending all that money anyway, then change it to a triple glazed unit with laminated glass. You will then have to insulate between the jamb and framing. Spray foam about 1″ – 1 1/2″ of the cavity. Then complete the soundproofing with Roxul 80. (Do not pack it tight. Dead air is the best soundproofing and insulation. In this case, more and tighter, is not better.) Extend the jamb to the inside of your new wall. Add more Roxul 80. (Or, if you are pretty good with a foam gun, spray another 1″ – 1 1/2″ foam bead at the inside edge of the jamb extension; thus leaving a dead air cavity.) Cut off excess, and install casing.
Note: I would use Melamine covered 3/4″ MDF for all of my jamb extensions. It is good soundproofing material; but mostly it is smooth, prefinished white, and easy to work with. (If you can buy it as shelving material instead of sheets, your life will be much easier. One 4 x 8 sheet weighs around 95 pounds, and running it through a table saw by yourself is just no fun.)
Here are 3 options to add soundproofing to your window:
- Nicetown Soundproofing Blackout Curtain. Available in many colors and sizes. Hangs and slides on a curtain rod. Not a perfect solution because they are held away from the wall by the rod and pleats.
- AcousticCurtain by Residential Acoustics. Blocks 21 – 25 decibels. Many color options. Custom sizes. Roll up straps. Hangs tight to the wall from hooks. Sides held to wall with choice of Velcro or magnetic strip. (Hooks, Velcro, magnetic strip available with curtain order.)
- Shut Eye Acoustical Shutters. 25 – 50 decibel noise reduction. Also keeps out light. Many color options. Custom made to your measurements. And you can add soundproofing curtains over them for extra quiet.
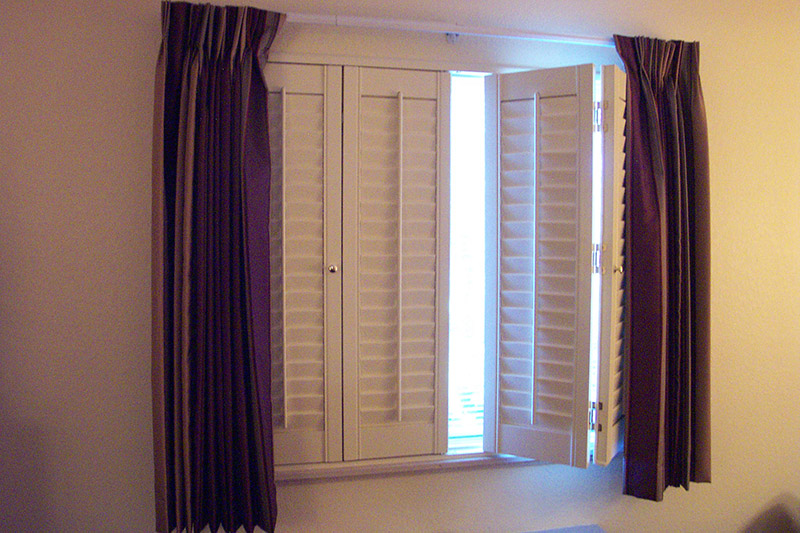 Acoustical Shutters
Door Soundproofing
The door is the weakest spot of your soundproofing efforts–because you have to have one, and it has to open and close. Your existing door is probably a 12 pound hollow core door that kind of acts like a bass drum when Airborne Noise hits it. You need to replace this thing with a solid core, or solid wood, 1 3/4″ thick slab. Order it prehung in a new frame to save yourself the hassle of routering out hinges and strikes, and drilling for the handle. (If there is any chance of getting the manufacturer to make the jamb to your new wall thickness–maybe up to 10 inches–have them do it.)
If you do not mind stepping over a sill every time, I would suggest purchasing a prehung exterior door which comes with weatherstrip and a sweep. (Note: Make sure you specify a felt pile sweep. Those rubber fins tear, make the door harder to operate, and are not a great sound barrier.) If you have room for an outswing door, give it some consideration. They have compression weatherstrip on the bottom instead of a sweep.
Once your door is installed level, square, and plumb; install casing on one side, spray foam to the backside of casing, and fill cavity with ProRox SL 960 Rockwool (do not pack tight). Finish installing casing, and caulk both sides to the wall. (For more soundproof door options and information please see our article How to Soundproof a Bathroom Door.) Even the best solid core door, installed properly, will only give you an STC rating of 50 – 55 so you will have to add more soundproofing to it:
- Order a double door–one swinging in, one swinging out–both with compression weatherstrip and sweeps. This will not double the STC rating but will give you a dead air space and vastly improved soundproofing.
- AcousticDoor curtain manufactured by Residential Acoustics. Blocks 21 – 25 decibels. Many color options. Custom sizes. Roll up straps. Hangs tight to the wall from hooks. Sides held to wall with choice of Velcro or magnetic strip. (Hooks, Velcro, magnetic strip available with curtain order.)
- Nicetown Soundproofing Blackout Curtain. Available in many colors and sizes. Hangs and slides on a curtain rod. Not a perfect solution because they are held away from the wall by the rod and pleats.
HVAC Soundproofing
HVAC noise is almost always Flanking Noise–sound that travels through the pipes and comes out in other rooms. Or travels through the gaps around the pipes. (Very few HVAC installers–if any– will drill a 4″ hole to install a 4″ pipe. It is going to be somewhat bigger for ease of installation.) You are going to have to deal with this as you are constructing your ‘room within a room’. There is also a probability you will run into electrical and plumbing penetrations; along with weird holes that do nothing. Seal the gaps around everything. Use acoustic caulking wherever possible. If the openings are much more than 1/4″ you will need some type of filler or backer first. You can use any, or all, of the following options–either alone, or together with acoustic caulking.
- Spray Foam Insulation: Will expand and fill cavity. Can be layered into opening and cut when dry.
- ProRox SL 960 Rockwool Rockwool Batt: Will fill large openings. Will act as backing for foam insulation.
- Putty Pads: Stop airborne noise. Can be molded to fit almost anything. Adheres to all types of material.
You will have to extend everything to the inside of your new walls or ceiling, then install vent covers, electrical fixtures and covers. Use any of the appropriate options above. Wrapping any pipe extensions with self adhesive Noico Red 150 mil soundproofing will add damping to them.
Once your room is complete, try to locate heavy furniture in front of vents to absorb sound before it gets into the system. You also have the option of cutting down, and hanging, a soundproof curtain over the opening. Or you can get creative with some of your acoustic treatments by blocking them out from the wall in front of the vents so they absorb or reflect sound, but still allow air to flow around them.
Note: HVAC vents are not things that should be sealed up–regardless of what you might read elsewhere. You could overload the system, shorten its lifespan, or cause a fire.
Successful Room-Within-a-Room Soundproofing
As the saying goes: ‘Knowledge is Power’. The more a person knows about the subject; the better decisions she/he will make.
Soundproofing Information
The following chart illustrates noise levels expressed in decibels. Before you begin your project, buy a decibel meter to check noise levels. The average interior wall will stop less than 40 decibels. So if Led Zeppelin is coming out of your speakers at 110 decibels, 70 decibels get to the other side. This is the equivalent of a car or truck driving through the room constantly–according to the chart.

This STC chart from Wikipedia (where you can find additional detailed information) will give you more information on the value of your soundproofing efforts.
Most STC ratings are calibrated using the most common frequencies between 125 Hertz and 4000 Hertz (Hz). Bass frequencies are lower than 125 Hz which makes the inclusion of bass traps in each corner of your room a good soundproofing investment–only if you are creating the sound. Bass traps do virtually nothing for incoming noise.
End Notes
Building a room-within-a-room is not for everyone. Where you live, whether you own or rent, how much you want to spend, what your needs are, along with many other personal decisions go into your soundproofing requirements. Consider all of your options before soundproofing your living environment. Remember that ‘Ready, Shoot, Aim’ might not be a viable plan. Before finalizing your plan you might want to look at some of our other articles for more ideas–How to Soundproof a Baby’s Room, Soundproof Blankets for Windows, How Much Does it Cost to Soundproof a Room?, How to Soundproof a Home Theater.

I’d like to use a variation of room in a room to soundproof my basement ceiling. The goal is to control airborne noise from Home Theater (at a moderate level not full blast) in the basement to the 1st floor living space. My floor joists are already insulated with fiberglass batts. My idea is to strap the joists with 1×2 then a layer of 5/8 drywall, then 1/2 x 2 strips of ridged insulation under the screws when attaching the 2nd layer. The idea is to create a 1/2 airspace between the 1st and 2nd layer of drywall. I’ve read a lot about green glue but it’s expensive, runny, and just seems like a bit too much of magic in a tube for me.
Hi Bruce,
I did reply a while ago but apparently the technological gremlins that haunt my computer ate it. Firstly, Green Glue is magic in a tube, but I do understand expensive and runny.
I do not like the rigid insulation idea. It will transfer noise pretty easily. Good R-value. Questionable soundproofing. If you don’t like Green Glue give some thought to QuietRock. It has the same viscoelastic sandwiched between 2 thinner pieces of drywall. Get the 5/8″ thick product. I would not bother with an air space if you use it. Just install 2 layers of drywall for the mass. You could also give some thought to 1 lb. Mass Loaded Vinyl on the joists before drywall. MLV has an STC rating of 23 not including the drywall.
Terry
Hi Terry,
Thank you for the information and product recomendations.
Would there be any changes to these concepts and product recomendations for something like the inside of a box truck body (like a smaller U-Haul)? For example, I’m thinking about building a mobile living space with studio capability for things like voiceovers and interviews. Especially considering that the shells are usually sheet metal.
Also, would there be any befefit in just creating the gap on the floors and cealings (I’m not sure if I’d want to sacrifice wall space).
Thank you,
Hi JB,
The construction of the exterior skin should not matter. What you are trying to accomplish is the isolation of the interior room from the exterior skin. This is why you need the gap between existing walls and new walls. Even a small gap of 1/2″. As long as you exterior skin cannot touch the interior walls.
Terry
Hi Terry,
This article was a wonderful read and very timely for me. I’m planning a 18’x24’ Rehearsal / Recording Studio and have gone through books and numerous articles on the construction. I love your idea for the walls, option 3 with the 3/4” plywood. I plan to hang some guitars and other items on the wall, and this solves that dilemma perfectly! My biggest concern at this point has been the ceiling/roof… since this will be a standalone structure with a 2/12 slant roof, I’m concerned about constructing separate roof and ceiling structures. I’d love to hear your thoughts about managing the ceiling/roof as I’ve found very little info on this specific topic. I do plan on having an electrical drop and a 4×4 XLR box in the ceiling for monitors and or mics for recording, so I would want some supportive strength. Seems like this can be accomplished with wall option 3, but would you then go with a separate ceiling to roof structure with the air gap similar to the walls? The structure would also have a concrete slab floor, and I don’t plan on having a separate floating floor, no worries about the earth underneath me hearing my band! Thanks in advance for any thoughts you may have.
Scott