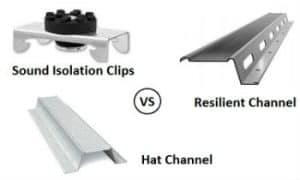
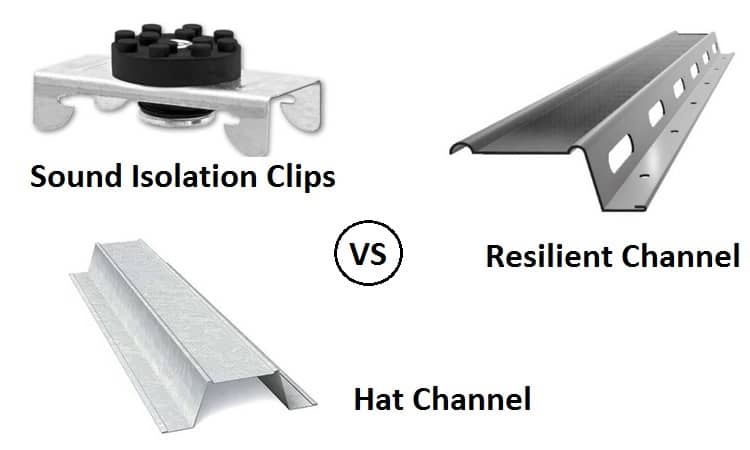
Sound isolation clips vs resilient channels vs hat channel are 3 ways to improve the STC (sound transmission class) of a partition. Which works best, is the better bang for your buck, and is easiest to use? Before closing up the walls, I wanted to know, so that I could do the best soundproofing job.
Sound isolation clips coupled with hat channels are more effective and reliable than resilient channels at reducing sound transfer through walls or ceilings. Although more expensive, they won’t sag and compromise the sound barrier. Plus, they have a lower resonance value and will mute low-frequency disruptions better. Both resilient channels and isolation clips require some expertise during installation. However, the clips are a more dependable and user-friendly product.
Acoustic Decoupling Explained
Acoustic decoupling is the interruption of sound movement into or out of a room through the walls, ceiling, and floor using specialized building techniques or products. Additionally, specialized clips or channels are available to separate structural building members from the drywall to prevent or limit the passage of vibrational sound.
It will control higher frequencies, but can create a low frequency resonance or vibration that may be disturbing.
Sound waves travel through walls at different rates based on their frequency. A 2×4 partition wall with 5/8” drywall on both sides will stop some sound movement (approximately STC 34). Adding 2” of insulation between the studs will control more noise movement (approximately STC 38). Unfortunately, where the drywall touches wood and insulation, a direct sound path between the two areas separated by the wall is established.
Decoupling the drywall from the studs using clips or channels breaks the link for sound to travel along, and adds about a 1-inch air space between the drywall and insulation, making the insulation more effective (approximately STC 48).
Decoupling will decrease high-frequency sound movement, and adding extra drywall (mass) and sound insulation (absorption) will help control low-frequency resonance. Additionally, using a viscoelastic compound or MLV will damp sound and further improve the decoupling effect.
What Is Resilient Channel?
 Resilient channel is a thin strip of metal bent to form a spring-like channel. One edge is fastened to the studs, and the drywall is screwed to the offset side, so it doesn’t touch the stud.
They are attached perpendicular to the studs or joists, forming a grid-like framework. The separation or decoupling of the gypsum sheet from the stud helps prevent sound moving through the wall.
The drywall mustn’t come in contact with the ceiling or floor, or adjoining walls, and no screws through the panel can contact a stud or other wall member. The seams should be filled with acoustic caulking to finish the sound barrier.
If there is contact, the sound will travel through, negating the effectiveness of the channel. If adding a second layer of plasterboard, or using a denser sheet, some channels can sag allowing contact with the floor, so make sure the channel is rated for heavier material.
Cost: between $6 and $10 for a 12-foot length
Pros
- Decouple wall and prevent sound transfer.
- Can improve STC values by 5 – 10 or more points.
- Added airspace improves the effectiveness of insulation.
Cons
- Easily compromised if not installed properly.
- Can be bent or crimped, decreasing the effectiveness.
- No standard for manufacturing, so STC rates vary
What Is a Hat Channel?
 A hat channel is so named because it has the profile like a Fedora. Made of galvanized steel or aluminum, and formed into a furring strip-like channel. It is often used for concrete and masonry surfaces, and to separate wall or ceiling finishing materials from structural members.
The channel is usually attached perpendicular to the joists or horizontally on the studs, and the ‘brim’ is commonly nailed or screwed to the structural pieces. The drywall or other finishes are attached to the ‘crown’ of the channel.
Hat channels are available in standard 10’ and 12’ lengths and range between 7/8” to 1-1/2” from the ‘brim’ to the ‘crown’; the greater the depth, the more weight it can support. They are also available in 16 to 25 gauge metal depending on the application.
Aluminum hats are easier to cut than steel, so if there are many cuts that may be a better choice. Similar to wooden furring strips, hat channels create a raised, smooth, level surface on which to attach sheathing.
The airspace created by using hat channels helps increase the sound control effectiveness of insulation in the wall cavities from an STC of 36 to 46. Unfortunately, the strips by themselves don’t isolate the wall members, so sound vibration can still penetrate.
Combining hat channels with soundproofing or resilient clips, however, can improve the STC rate by an additional 15 and 20 points.
Cost: price varies based on length, gauge, depth, and quantity – 12-foot length, 25 gauge, 7/8”, is about $6 for one length.
Pros
- Easy to install.
- Improve sound absorption by insulation.
- Provides smooth level surface for attaching drywall.
- Help separate interior finishes from moisture and fire.
Cons
- Less effective at noise control than resilient channels.
What Are Sound Isolation Clips?
 Sound isolation clips contain a rubber section that separates a metal clip from the stud or joist to provide a vibrational sound barrier. A hat channel is slid or pinched into the clips, and then the drywall connected to the crown of the channel.
The screws attaching the drywall to the channel should be offset so there is no danger of connecting with any structural member. Additionally, there should be a 1/4-inch gap around the perimeter of each sheet, so it isn’t touching the floor, ceiling, or other sheets. The gap should be filled with an acoustic fire, and smoke rated caulking.
The rubber component of the sound clips decouples the wall or ceiling structure from the hat channel and effectively blocks low-frequency noise. The clips can support the weight of one or two layers of drywall, and create a floating wall or ceiling that isn’t directly connected to studs or joists.
The clips absorb the sound vibration, so it doesn’t get to the drywall, and prevents sound moving in both directions. There are different brands of clips available with different sound ratings and price points.
Cost: $4.50 – $7 each depending on quantity, plus the cost of hat channels.
Pros
- Can provide a 15 to 20 point improvement to the STC rating of a partition.
- A reliable sound control option.
- Can support two layers of drywall.
Cons
- Expensive.
- Requires more time and accuracy for installation.
Resilient Channel vs Hat Channel
Resilient channels like RC-1 or RC-2 have a profile like a baseball cap with the back shorter than the front – also known as a one-leg resilient hat channel. It is attached to the framing through the single leg or brim.
A hat channel has a profile like a fedora and is attached to studs or joists through both legs, or brims, so twice the amount of screws. Resilient and hat channels cost about the same and are installed in similar patterns perpendicular to studs or joists.
Both RC and hat channel systems provide airspace between the insulation and wallboard, which improves sound control. Hat channels can improve the STC rate of an insulated single 5/8 board wall to 46.
The double attachment of the hat allows it to support more mass than the single connection of the RC-1 or RC-2 channels. However, the dual connection also doubles the transfer points for sound vibration movement.
For the best sound isolation, there should be a 1/4-inch gap around the perimeter of the drywall, separating it from the ceiling, floor, and other boards. The gap is filled with acoustic caulk to minimize the seepage of noise.
The strength of the hat channel ensures that the weight of the gypsum doesn’t shift. Unfortunately, the RC system can sag under the weight, allowing direct contact with structural members and negating any improvement.
In lab tests – aka the perfect world – RC-1 and 2 systems can improve noise control by an STC of 5 to 10 points. Sadly though, real-world installation doesn’t hold up.
There are too many factors in the installation of the channels and the sheeting which can allow breaching of the sound barrier. Additionally, outlets, switch boxes, ductwork, and doors all penetrate and provide paths for flanking noise. These same issues apply to hat channels, except for sagging.
The drywall stays where it is placed, so there is less possibility of connecting with structural pieces. Hat channels can be installed by a DIYer, however resilient channels should be installed by an expert who provides warranties and guarantees.
Sound Isolation Clips vs Resilient Channel
Resilient channels, or RC channels and sound isolation clips work to decouple drywall from stud or joist partitions. However, while designed for the same purpose, their performance is not the same.
Resilient channels are extruded or bent metal strips attached to structural pieces, or existing drywall. Isolation clips attach to structural members and usually have a rubber noise canceling component that stops sound vibration transmission.
The RC is a one-legged channel that attaches to the joist or stud with one screw per contact point. The channels are connected perpendicular to the wall or ceiling members or existing gypsum surface at manufacturer specified distances. The drywall is screwed to the flat crown part of the RC using 1-inch drywall screws, so they don’t connect with structural members.
Isolation clips are also secured in a linear pattern perpendicular to studs or joists following manufacturer’s instructions. However, hat channels must be fixed to the clips to provide the gap between the insulated wall and the wallboard, and on which to secure the drywall. Shorter 1-inch drywall screws are also used to prevent short-circuiting the sound barrier.
To “soundproof” an 8×12 wall with studs at 16-inch centers, and using 2 layers of 5/8” drywall would require 6 to 7 heavy-duty RC-2 resilient channels at $6 per piece, for a total of $42. To do the same wall using sound isolation clips would require approximately 35 clips (based on manufacturer’s instructions), plus 7 hat channels for a total just shy of $200.
If everything worked as it should, the resilient channels could improve the STC by up to 10 points, while the isolation clip-hat channel combination could achieve an overall assembly STC rating of 66 or better.
The success of sound control depends on the quality of the clips or channels, plus how well the manufacturer’s instructions are followed, and the care taken by the installer. If it’s not installed correctly, it’s worthless. Even experienced DIYers will require assistance.
Sound isolation clips can hold more mass than resilient channels, which means better sound control. The clips also have the rubber piece to damp sound vibration which isn’t present in the channels, further improving soundproofing.
The combination of clips and hat channel increases the air space between the drywall and insulation, reducing sound transfer. The isolation clips and hat channels are also easier to install, and less likely to fail due to weight or be compromised during installation.
How to Install Resilient Channel
Resilient channels are used to decouple the drywall sheeting from the structural framework of a building. For soundproofing purposes, there must be insulation within the wall or ceiling cavities.
Walls
Resilient channels are installed horizontally or perpendicular to the studs. The bottom row is attached within 2-inches of the floor, and the top within 6-inches of the ceiling. If installing one layer of gypsum, the remaining rows can be at 24-inch centers.
If doubling the drywall layers, the channels should be at 16-inch centers to support the added mass. If the wall will support shelving or cabinets, then additional channels should be installed to align with the top, bottom, and mid-point of those units.
The screw leg should be below the flat where the drywall is attached to decrease sagging. To attach the channels to wood studs, use a 1-1/4” W-type bugle head screw, for steel framing use 3/8” S-12 type pan head screws.
Channels can be spliced to overlap at a stud or abut on a stud, leaving 1/8” gap between the two ends. The channels can also be cantilevered up to 6-inches.
The gypsum panels should be fastened with 1-inch drywall screws, so they can’t encounter a stud and breach the sound barrier. A 1/4” gap should be left around the perimeter of the wall and filled with acoustic caulking. The same should be done with electrical boxes and other holes made in the drywall.
Ceiling
 Resilient channels should be installed perpendicular to the joists. If the joists are at 16-inch centers, then the channels can be at 24-inch centers. For joists at 24-inch centers, the channels should be at 16-inch centers.
The two outside channels should be within 3-inches of the adjacent walls. The channel ends can extend up to 6-inches past the joists and should be within 3-inches of the walls parallel to the joists.
To fasten the metal furring strips to wooden joists, use Type S or W screws at least 1-1/4” in length. The screws should go through the holes in the mounting flange where possible.
Nails should never be used to attach channels. Fasten the drywall with screws that will penetrate the thickness of the drywall and into the channel face sufficiently to secure without penetrating the framework, 1-inch for one layer of gypsum.
When installing the sheetrock, leave a 1/4″ gap around the ceiling perimeter and fill with acoustic caulk to prevent sound transfer. Use surface mount lights to minimize holes in the sound barrier, and fill all holes with the same caulking. If spraying a textured finish onto the finished ceiling, 12-inch spacing is suggested for the channels.
How to Install Resilient Sound Isolation Clips
The clips are attached in a linear pattern perpendicular to the studs or joists and at a maximum distance of 48” on center. For walls, the bottom row should be no more than 2-inches from the floor, and 6-inches or closer to the ceiling. For ceilings, fasten the clips within 8-inches of the walls at the ends of each run of each channel.
The maximum separation between rows is 24-inches for one layer of 5/8” gypsum, and 16-inches for a double layer. A clip should fully support the ends of each row.
Secure the isolation clip following the manufacturer’s instructions. The clips are fastened to the wood with 2-1/2” Type W screws, or steel with 1-5/8” Type S screws. Do not use nails.
Using Sound Isolation Clips with Hat Channel
The hat channels should be a minimum of 25 gauge steel, between 7/8” and 1-1/2” deep and have a 1-1/4” crown to seat the drywall against. The channel is pinched into the clip and should be overlapped 6-inches midway between clips, and secured with screws or wire.
Drywall panels are secured to the furring strips with S Type bugle head screws 1-1/8” for 1/2” gypsum, 1-1/4” for 5/8” sheets, or 1-5/8” screws for two layers of gypsum.
The gypsum panels should have a 1/4″ around their perimeter which should be filled with acoustic caulking, as should any electrical or ductwork through the drywall. Sound isolation clips with hat channels and drywall provide an excellent sound barrier for insulated walls and ceilings. Unfortunately, attaching cabinets and bookshelves is not recommended.
How to Improve Soundproofing
There are other ways the sound can be reduced, either with or without resilient channels, sound isolation clips, or hat channels. Adding insulation and air space are two already mentioned. Here are three more which can be added post-construction, or during construction or renovations.
Note: For other information on improving soundproofing, please see our articles How to Build a Room-Within-a-Room, and How Much Does it Cost to Soundproof a Room?
Double Drywall
Adding a second layer of drywall improves the mass of the wall or ceiling and can improve the STC rating by up to 10 points. A 1/4″ gap must be left around the perimeter and filled with acoustic caulking. Additionally, screws used to secure the second layer need to miss all structural framing, so the sound barrier isn’t compromised.
Green Glue
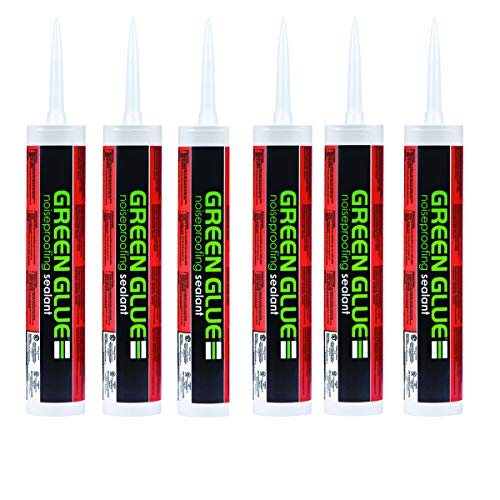 Spreading a layer of a viscoelastic compound like Green Glue between layers of drywall will help damp 70% to 90% of transfer vibrations from sound waves.
It’s easy to apply and will effectively control low, medium, and high-frequency sound.
Mass Loaded Vinyl
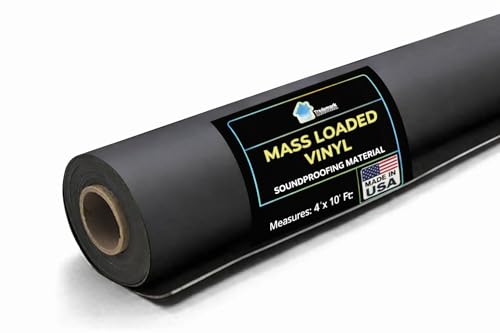 Adding mass loaded vinyl is another way to damp sound vibration.
The heavy polymer sheet can be attached to studs or joists before buttoning up the walls or ceiling.
It can also be sandwiched between drywall layers or hung like a curtain to damp sound vibration. MLV has an STC between 21 and 31 depending on its thickness.
Conclusion
Resilient channels may be less expensive, but isolation clips have lower resonance and stop a broader spectrum of noise, making it inaudible and less disruptive to our ears. If you are serious about creating a quiet, more sound controlled space, I would recommend sound isolation clips with hat channels, then hat channels, and finally, resilient channels.
I hope you found this article of interest and value. Share it with others if you did. Your comments and suggestions are always appreciated too.

Question:
1. I want to use tongue and groove pine instead of drywall on my ceiling. I was thinking of attaching 1×3 strapping to the channels and then the tongue and groove pine to the strapping. Is that ok?
2. The direction of the tongue and groove pine would be perpendicular to the floor joists. Can I put the resilient or hat channels along the floor joists instead of perpendicular to them? Would it be better to use the isolation clips in this situation?
3. Instead of using these channels could I just use strapping along the floor joists (using green glue between the strapping and the floor joist and screws to hold the strapping in place) then attach the tongue and groove pine to the strapping?
Very informative, very clear. Thank you!
Quick question about the length of screw for 2nd layer of drywall attached into hat channel.
You say that for 2 layers we should use 1 5/8″. Is that for when using 5/8″? That would only leave aproximately 3/8″ depth screwed into hat channel. I was told by green glue company to use 1 5/8″ also but am just wondering if 3/8″ is strong enough to hold. Thanks for your time.
If we don’t use resilent channel or at track, You state “Additionally, screws used to secure the second layer need to miss all structural framing, so the sound barrier isn’t compromised”
How is second layer securely attached? We plan to do 2 layers on ceiling, should we use 1/2″ sag resistant over 5/8″?
Great article, thank you.
Eugene, thank you for your time and effort in putting together this information and publishing this article. I found it very informative and incredibly helpful.
Thank you, I was about to hire a DIYer to install RC and have decided not to. The wall I want to soundproof is already in place, between two sides of a duplex. Would framing another wall next to it, 1/4 inch away and attached only to the side walls, ceiling and floor be just as good? With 5/8 drywall on the outside? Or maybe two layers of drywall with green glue between?
When installing to a ceiling (2×10 wood joist) with clips and hat channel, would one layer of 5/8″ Type X drywall be sufficient if there was a Maxxon 3/8″ sound mat under 1″ of gypcrete under a floor underlayment topped with Luxury Vinyl Flooring. While two layers is better, the need for the space is an issue on our project. There is also a plan for 6″ of insulation. The concern is for sufficient IIC reduction.
Hi Gary,
I think you will have more than enough. The only thing I would suggest is using QuietWalk Plus underlayment. It has an IIC of up to 71 depending on floor assembly, and is Luxury Vinyl Flooring specific.
Terry
Another advantage of using RC, specially in an older house, is that the channel even-outs small variations in joist depths. Done correctly a basement ceiling will be dead-flat after installation of channels and sheet rock. Have used the RC in every house I’ve built for the past 50 years, no problems.
I want to sound insulate a room, but also want to have floor to ceiling bookshelves on one wall.
Any recommendations on how to achieve that?
We are trying to sound barrier between first floor and 2nd floors of two apartments (i.e. ceiling on first floor apartment).
Plan to use isolation clips over-at existing drywall ceiling, then 5/8 quiet rock (like drywall -heard of quiet rock for better sound barrier?), then anther layer of Quiet Rock but with MLV between, but ALSO then with green glue on last 5/8 sheet to stick to the MVL.
Would it be OK for the green glue to attach (glue to) the the MLV that is between the two sheets of drywall (ie. Quiet Rock). Learning as go along here !
Thanks for al your information. Wonderful to learn ! Is above a good Plan ?
Scott