Everybody wants a nice quiet cabin in their vehicle as they drive, but achieving such a ride can be quite difficult. Sound deadening mats are expensive and can be a huge hassle to install. A great alternative that many people are not aware of is sound deadening spray.
Sound deadening spray can be much easier and quicker than installing unruly mats throughout your vehicle. How does the spray stack up against mats for soundproofing? Which sound deadening sprays are the best options and what are any potential drawbacks to using them? In this article, we will take an in-depth look at the best sound deadening spray for cars.
Note: For information on other automotive noise control please see some of our articles: How to Fix Car Speaker Rattle, and How to Quiet a Loud Exhaust, and Kilmat vs Noico vs Dynamat vs Hushmat, and How to Fix Noisy Lifters, and Will Thicker Oil Make an Engine Quieter?
Top Pic for Best Sound Deadening Spray
- Reduce unwanted road noise and vibration, even in hard-to-reach...
- Won't crack or chip; helps prevent rust
- Paintable in just 6 hours
- Single can will cover approximately 20 sq. ft.
- Fit type: Universal Fit
- 3M Professional Grade Rubberized Undercoating
- Lizard Skin Sound Deadening
- Rust-Oleum Automotive Rubberized Undercoating
- Second Skin Audio Spectrum Liquid Sound Deadening Spray and Paint
- Dupli-Color UC102 Rubberized Undercoat and Sound Eliminator
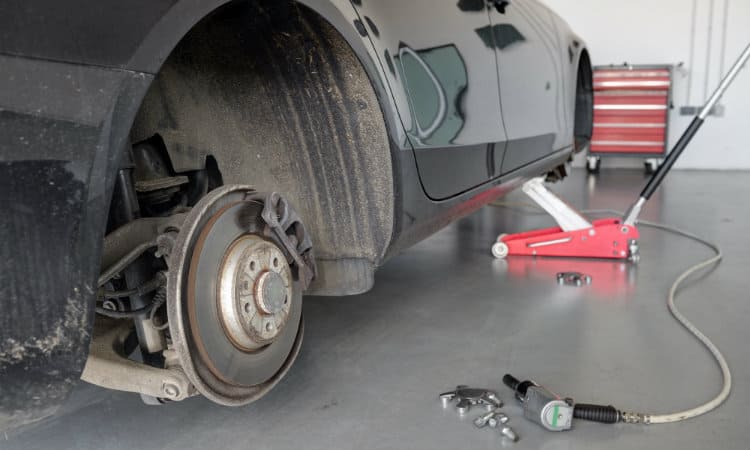
What is Sound Deadening Spray for Cars?
Sound deadening spray for cars is a liquid compound that can be applied to hard surfaces to reduce vibrations and the transmission of sound. It is available through several different manufacturers and may be applied through different methods.
This spray performs the same function as sound deadening mats, but in a much easier to install medium. It can help eliminate road-noise, improve your vehicle’s sound system, and dampen vibrations.
What is it Made of?
This product is essentially a liquid version of Mass Limp Vinyl (MLV), a common and effective rolled soundproofing material. It is a rubberized coating, and some brands have mixed it with other bases such as ceramic or asphalt. Most claim not to crack, although reviews tell a slightly different story!
Where and When to use Sound Deadening Spray?
Although designed for automotive applications, this spray has many other uses. It could potentially be applied to any surface you wish to stop transmitting vibrations and sound. You may decide to coat the exterior of a soundproof box for air compressor with this spray to create an even quieter working environment.
When utilizing sound deadening spray in a car, it is generally applied to the bare metal of all the interior surfaces, the same way that mats would be. However, it is made to withstand very high temperatures and can also be used in engine compartments, as well as on the undercarriage.
Although mats may potentially be more effective at soundproofing, they are also a lot more challenging to install. Because of this, you may opt to use spray for the ease of installation. Alternatively, you may choose to use a spray in the more difficult to reach areas, and mats where the installation isn’t as much of a pain.
How Does Sound Deadening Spray Work?
Sound is transferred through the vibration of surfaces. Sound deadening spray reduces these vibrations in two ways. First, it adds mass to the surface, making it heavier, thicker, and harder to move, thus curbing vibrations. Secondly, because of its makeup, the spray will absorb some of those vibrations and kill the energy of the sound waves.
Different Types of Products
Some sound deadening sprays like the Lizard Skin 50115 come by the gallon and must be used through a paint sprayer such as an HVLP gun. These may need to be mixed and can be purchased in a kit that includes everything you need for the application.
Many of the sprays instead come in aerosol cans that need to be shaken up well before the coat is applied. These make it a straightforward process to start soundproofing your car.
Other liquid soundproofing products are available such as paint on versions, but in this article, we will stick to covering the spray-on types.
Pros and Cons of Sound Deadening Spray
Pros
- More cost-efficient than mats
- Easier to install
- Can help protect your vehicle
- Reduces sound and vibration from road-noise, music, and other sources
- Can get to hard to reach areas
- Can apply extra layers to improve sound reduction characteristics
Cons
- May not be quite as effective as mats
- Messier application
- May chip or crack
Best Automotive Sound Deadening Spray
Although each of the sprays on the market is meant to do the same thing, they do have some differences that are worth noting. Let’s take an in-depth look at each of the most popular products in this category and see how they compare, and which one might be right for you.
1. Design Engineering Boom Mat Spray-on Sound Deadening
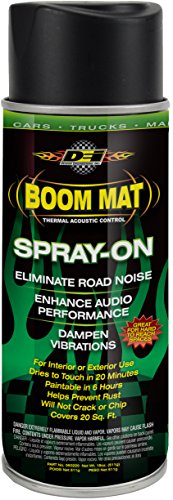
The Boom Mat spray not only reduces noise and vibration, but it also acts as a thermal barrier good up to 300 degrees, reducing unwanted heat. Because of this, it can be applied to firewalls and engine compartments with no issues and can help to reduce the heat transfer from the engine into the cabin.
Advertised as a durable product, this spray won’t chip or crack and it also helps to protect against rust. Beyond this, it can protect the undercarriage of your vehicle from rocks and debris that may fly up while driving. It can be applied underneath your car, as well as inside of wheel wells and body panels. When this is done, it can help to curb unwanted squeaks, sounds, and noises from the road.
According to the manufacturer, a single can will cover an area of approximately 20 sq ft. It dries to a paintable finish in only 6 hours.
If one coat doesn’t seem to be reducing as much noise as hoped, this product can be applied in multiple layers to enhance the effect.
Despite all the positive traits, it does have a harsh odor on installation. However, the smell dissipates in a few days to weeks, leaving no permanent odors. It is VOC compliant though, so the smell isn’t something to worry about.
Pros
- Thermal barrier insulates against heat
- Doesn’t chip or crack and protects against rust
- Dries in just 6 hours
Cons
- Harsh odor takes a while to air out
2. 3M Professional Grade Rubberized Undercoating
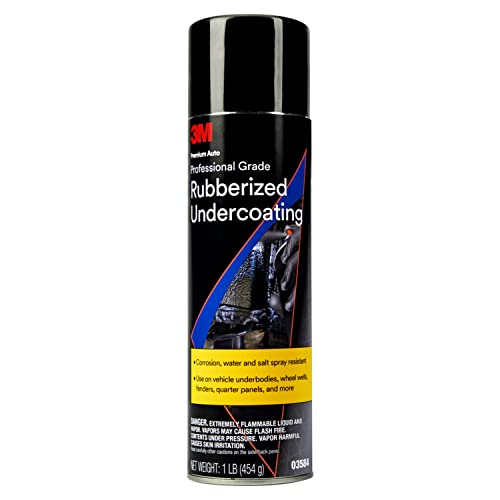
3M rubberized sound deadening spray is asphalt-based, which makes it perfect for coating your vehicles undercarriage, wheel wells, and engine compartment. It provides excellent protection against chipping, abrasion, weathering, and rust. Since it is rubberized, it creates a barrier, sealing out moisture and grime to help stop corrosion of metal parts.
One of the unique features of this particular product is that it allows you to build up a single coat with no running or drips. This will help eliminate the need for additional applications and can help improve the reduction of sound.
The 3M spray says it covers about 6 sq ft, but it doesn’t mention how thick of a coating that is.
The spray dries to a nice looking flat black finish, but it can be primed and painted over to achieve the desired look. 3Ms spray does show high levels of durability, even taking multiple passes with the tip of a screwdriver to get through the coating and down to the bare metal beneath.
The main drawback of this product is an uneven or clumpy spray pattern. The can may work great in the beginning, but then the spray may clump up and it becomes very difficult to achieve an even coating.
Although this spray lacks the harsh odors present in some of the others, it does contain VOCs. Also, it can stick to your skin incredibly well and become very difficult to remove. Due to these two concerns, it is recommended that you wear gloves and a breathing mask for your safety.
Pros
- Seals and protects from the elements
- One-coat buildup for easy application
- Durable finish that resists scratches
Cons
- Uneven or clumpy spray
- May take a few cans to cover a surface
3. Lizard Skin Sound Deadening
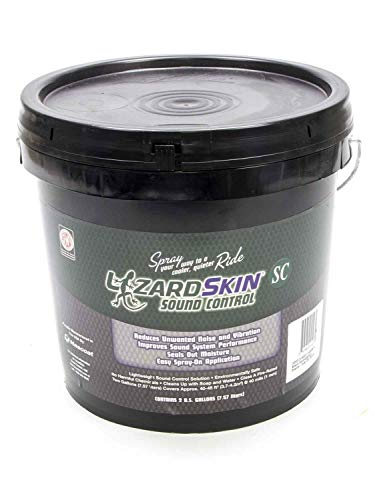
While most of the other similar products come in an aerosol can, the Lizard Skin Sound Deadening version comes in a gallon bucket. You will need a separate spray gun to apply it. Lizard Skin does sell a spray gun kit with everything you need, but that can definitely up the cost of your project unless you already have a paint sprayer.
This spray dampens rattles and vibrations and reduces road noise. It also acts as a protectant from scratches and rust. One thing that sets it apart is being ceramic based. Because of this, it can offer a hard finish that is a superior protectant.
More than just a sound deadener, it is also a heat barrier that can help block engine heat if applied to your firewall, helping the cab of your stay cooler.
Unlike some of this product’s competitors, the Lizard Skin spray is non-toxic, as well as environmentally friendly. It is also water-soluble, so it offers easy soap and water cleanup. It is still recommended that you wear gloves and a mask during application though.
At a thickness of 40mils, the recommended thickness for application of this product, a single gallon will cover approximately 20-23 sq ft. It is only sold in gallons and is available in a one or two-gallon bucket. At almost $100 for a single gallon bucket from the manufacturer’s website, this is one of the most expensive products on the list. This is even more so if you do not currently possess a paint sprayer.
Pros
- Superior scratch and rust resistance
- Excellent sound dampening
- Single coat coverage of 40 mils
- Insulating heat barrier
Cons
- Expensive
- Requires separate paint sprayer
4. Rust-Oleum Automotive Rubberized Undercoating

This rubberized coating from Rust-Oleum prevents corrosion from water, salt, and other chemicals. Although mainly intended for your vehicle’s undercarriage, it could still be applied to the interior for the sound dampening effect. It also provides a barrier against rust.
This spray does not have heat reduction properties, but it is safe to be used in areas with temperatures up to 200 degrees Fahrenheit. This means it can still be applied in the engine compartment and on the firewall to reduce noise and dampen vibrations, even though it won’t help reduce heat.
You can paint directly overtop this product for an improved finish.
Despite not having as intense of an odor as some of the other comparable aerosol sprays, the Rusto-Oleum spray still has a slight smell that will take a few days to air out.
A single 15oz can offers coverage of 10-15 sq ft for a single coat. This aerosol spray is very quick-drying, and multiple coats can be added in 15-minute intervals. By adding additional layers, you can improve the vibration dampening of this product.
Before applying this product, be sure to remove any surface rust and get the area completely clean. If you do not, it is likely the application will not stick well, and it will flake off in a few months. If you do proper prep work before spraying, then this product should be very effective and remain permanent.
Pros
- Cost-effective
- Short drying times
- Prevents corrosion and rust
Cons
- Not a thermal barrier
5. Second Skin Audio Spectrum Liquid Sound Deadening Spray and Paint

This viscoelastic polymer from Second Skin is available in 1-gallon and 5-gallon buckets. A single gallon will cover 20 sq ft with two coats, resulting in a total thickness of 2mm. This product can be sprayed on with a separate paint sprayer, or it can be rolled on instead.
At a rating of 400 degrees, Second Skin offers the highest thermal barrier heat protection of any comparable products. This makes it a superior choice for reducing heat transfer from the engine compartment by applying it to the firewall.
Since it is viscoelastic, this sound deadener will absorb the vibrations and offer excellent dampening. For the best acoustic performance, the manufacturer recommends a 2mm thick finish applied in two coats.
Although it is intended to be applied to metal surfaces, this paint can be used on many other surfaces once they are sanded, or if a primer is applied first.
The Second Skin paint has one of the slower dry times, requiring 24 hours between coats. This means that the application will take much longer overall. If you want to paint over this product or add a spray-on bed liner, you will have to wait 10 days before doing so. If you are an impatient person (as I happen to be myself!), then this may be a deal-breaker for you.
Since it is water-soluble, any mess can be easily cleaned up with water in the first 30 minutes after applying. Stored at room temperature, it has a shelf life of one year.
Pros
- Superior thermal barrier
- Excellent vibration dampening since it is viscoelastic
- Water-soluble so easy to clean up
Cons
- Prolonged drying time
6. Dupli-Color UC102 Rubberized Undercoat and Sound Eliminator

The Dupli-Color sound eliminator comes in an aerosol can and is available in three different levels; standard, premium, and professional. It comes in a 17oz can, but the exact coverage is unknown.
This automotive undercoating offers moisture protection for metal surfaces, protecting against corrosion and rust. It provides a durable, rubberized finish that is fully paintable.
Once applied, this spray does help to reduce road noise and road vibrations. Its primary purpose though is for protection and as a moisture barrier. It can be applied to wheel wells, the frame, floor pans, doors and more. It does not offer thermal heat protection though, so it may not be wise to apply it in the engine compartment, or on the firewall.
One of the more quick-drying sound dampening methods available, it is dry to the touch in only an hour, and fully handleable in two.
If sound deadening is your main purpose for applying a product such as this one, then I would suggest going with one of the other products on this list. Although the Dupli-color rubberized spray does help reduce vibrations, it is mostly meant as a protective coating and will not be as effective at reducing sound as some of the similar options.
Pros
- Offers excellent corrosion and rust protection
- Totally dry in only two hours
Cons
- Not a thermal barrier and no temperature rating
- Not as effective at sound deadening as other options
How to Apply Sound Deadening Spray
Once you have decided on a product that suits your needs, you’ll want to know the best methods of application. Different products may have slightly different instructions so check your specific one’s label. We will cover the basics of any type of spray-in sound deadener here.
Recommended Tools and Safety Equipment
Before you start spraying your vehicle, you’re going to make sure you’re fully equipped for the job. Below is a list of all the items you’ll need to apply your sound deadening spray.
Mask
You don’t want to breathe in the fumes of your sound deadener while you’re spraying! There will be loads of airborne particles and to filter them out you’ll need to wear a mask.
Gloves
You can use latex, nitrile, or nylon, but you want to make sure to wear them to avoid getting the product on your hands. Some products have easier cleanups than others, so if the spray you chose is water-soluble, it may not be a big deal to clean off of yourself. It’s still good to wear gloves though to avoid the mess in the first place.
Masking tape
Overspray is a serious threat when you’re applying any product as a spray. Minimize or avoid it entirely by properly covering any surface you don’t want the spray to cover. Masking tape is the usual choice and comes in varieties meant specifically for painting.
Newspaper and/or cardboard
You will use either newspaper, cardboard, or both along with the tape to cover anything you do not want to get spray on it.
Paint sprayer
If the sound deadening product you chose comes in a gallon bucket, then you may need a paint sprayer to apply it. Some brands can be rolled on instead of sprayed, so be sure to check the label on your bucket.
Mixer
This one also only applies to sprays that came in a bucket. Some parts of the paint may settle during storage, so it is important to properly mix the solution before use.
Step 1: Surface Preparation
Your product will need to be applied to a clean surface of bare metal that is free of rust or other contaminants. Use a cleaner or rubbing alcohol to make sure your surface is ready for application. If any surface rust exists, you will need to sand it down before applying your solution.
Use tape and newspaper or cardboard to cover any surfaces that you do not want to get the spray on. Depending on your product, it may be very difficult to remove once it’s on, so be sure to take care of this step.
Don’t underestimate the reach of overspray. I recommend covering anything even near the surface you intend to spray.
Step 2: Product Preparation
This step is a little bit different depending on if you have an aerosol spray or one that is being used in a separate paint sprayer.
Aerosol: Best used at temperatures between 70 and 90 degrees F. Shake the can hard for at least one continuous minute. Start your minute once you start to hear the rattle.
Gallon: The product will need to be mixed well to ensure that everything is evenly distributed throughout the solution. Use a drill with a mixer paddle and mix for 30-60 seconds.
Step 3: Apply the Sound Deadener
Once your product and your surface are prepped, it’s time to start spraying.
If you’re using an aerosol can point the nozzle towards the surface you wish to coat, holding it about 12” to 18” away. Press the spray button down to apply, and use short, even strokes. Occasionally you will need to shake the can vigorously like during preparation, so that you can keep it well mixed and it won’t clump up.
With a gallon bucket, you’ll need to add your liquid to your paint sprayer. Using short, steady arm movements, apply your product.
Be sure to coat the entire surface evenly. You don’t want a patchy finish. It won’t look good, and it won’t be as effective.
Step 4: Additional Coats
If you want to achieve maximum performance from your sound deadening product, you may wish to apply additional coats. Once your first coat has dried, you can layer on the second coat. Refer to your product label for drying time between coats, it could be 15 minutes or it could be as much as 24 hours!
The process is the same for all additional coats as it was with the first coat.
Step 5: Re-assemble
Once you have applied all coats of the sound deadener and you have allowed time for it to fully dry, you can put everything back together. If you’ve removed interior panels and seats, make sure to put everything back in using the reverse of the order that it came out!
Although most of these products do help resist cracking and chipping, still be careful not to directly hit them with anything as you don’t want to take that chance.
Step 6: Clean Equipment
Once you have finished applying the spray, you’ll need to clean everything down. Water and soap should suffice for water-soluble products. You can use paint thinner or rubbing alcohol for the products that are not.
If using a spray can, you’ll need to empty the tip. Hold the can upside down and spray the can for two seconds. Now it is ready to store.
Be sure to clean your spray gun out fully immediately after you finish spraying. If any of these products dry inside your sprayer, it could prove to be a major hassle to get it out!
Sound Deadening Spray vs Mat
Sound deadening sprays are relatively new on the market. Until recently, if you wanted to reduce noise in your car you would have installed mats. So how do the sprays compare to the mats?
Some of the sound deadening sprays may be as effective as the mats. A study by physics.aps.org found that liquid foam is as effective as solid forms of sound deadening like mats.
The biggest advantage of a spray over the mats is the ease and speed of installation. Mats are thick and heavy, and they can be very difficult to lineup, cut and install properly. This is even worse in hard to reach areas.
Sprays, on the other hand, are very easy to install and can get to hard to reach areas with relative ease. They can be applied in multiple coats for improved sound dampening, and they can also protect your vehicle’s metal surfaces from rust and corrosion.
Conclusion
Hopefully, this article has helped you determine which sound deadening spray will best suit your particular needs. Whether you want vibration dampening, protection from corrosion and rust, a heat barrier, or all of them, there is a sound deadening spray product that will help you achieve your needs.
If this article was useful for you, please help it reach others who it may also help, by sharing it on social media. If you have questions or comments, please leave them below. As always, it is appreciated!


Hi. I’m researching vibration dampening coatings for my company that could be applied to the inside of a hollow carbon fiber tube. The tube is a carbon fiber pool cue shaft. If you have any advice, I’d be interested. One concern I’d have about some coatings (and my concern may be invalid) is that after 20 years I’d be concerned that some spray coatings would fall/flake off inside the shaft, which would be bad.
Thank you,
Dan
Excellent overview, however MLV stands for Mass Loaded Vinyl (not limp vinyl).
all sounds good. I like the Lizard Skin product. Can it be rolled on also?