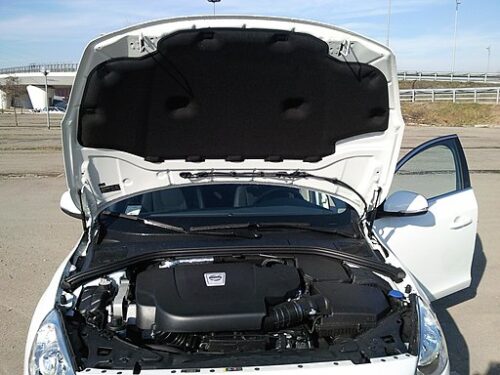
Installing Do-It-Yourself under hood insulation is actually a fairly easy process–with the proper products, a bit of time, and patience. Most of the products you can use for under-hood insulation and/or soundproofing are very user-friendly. They are almost all self-sticking, come in rolls or boxes of rectangular sheets, and are simple to install. (Most manufacturers offer these soundproofing products in different amounts, so you can match your hood’s size with how much you buy.)
DIY Under Hood Insulation – How to Get it Done
Tools You Need
The difficulty and time requirements of most DIY projects seem to be directly related to the number of, and cost of, tools required. Installing under hood insulation requires very few inexpensive tools. Here is what you need. And what you might need or want.
- Utility knife and/or scissors. To cut the product to size.
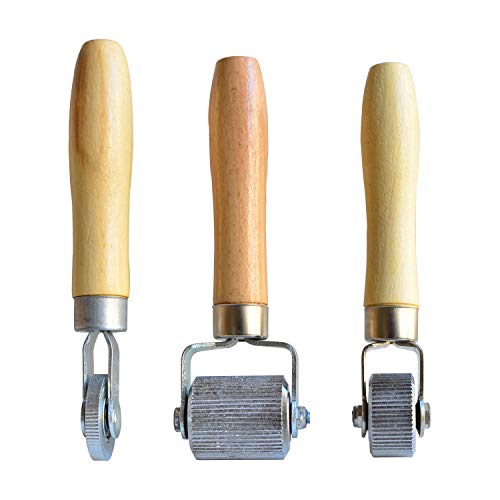
- Roller. Some soundproofing products need to be rolled flat to get the best performance from the material.
- Cleaner. To clean your hood so the new hood liner adheres properly. (If necessary)
- Paper towels. For cleaning hood. (If necessary)
- Step ladder. To reach the top of an open hood. This is totally dependent on your vehicle size–3/4 ton lifted pickup truck/Smart car.
- Drop sheet or blanket. If necessary to cover a dirty motor and only if you need to kneel on it, balance on it, or lay on it to get the job done.
Clean the Hood
Your vehicle may already have a hood liner, or insulation that is worn, torn, and just not doing the job any more. If so, you will need to remove it. Try not to damage it too much. You may want to use it as a template for your new product. Almost all of the products manufactured for under hood insulation are self-adhesive, making it essential that the area is clean. You can usually accomplish this with a 50/50 vinegar/water mixture and a clean water rinse and dry. If it is really greasy, you may need something like Chemical Guys Degreaser to get it clean. Rinse and dry well before installing the new product.
Some vehicles do not have factory installed hood insulation. With nothing to remove from the hood, you just need to clean it.

Cut the New Insulation Pieces
The new product will come in a roll or as individual pieces. The new material can come in varying quantities–depending on which manufacturer you purchase from. If you are using the old liner as a template, just lay it on the new liner, trace and cut. If you have no template, or the old stuff came off in small pieces, you will need to hold each new piece in place against the hood, mark it, then cut it. (It is a good idea to cut the pieces a little bigger than you think they should be, then trim them to fit.)
Most hoods–especially large ones–are made with heavier steel braces and/or cross braces to keep the hood stable. It is very difficult to get your new liner under them–even if there is a gap. (My dodge has a gap but every few inches there is a silver dollar-sized spot of silicone to provide decoupling between hood and braces–eliminating vibration rattles and noise transference.) But the main reason for not even trying to get new insulation under the braces is its sticky back. Once it is even partially attached to the hood, it will not slide anywhere.
Therefore, if you want to ensure that the complete hood is insulated, cut strips of new material wide enough to cover the braces and overlap the insulation already installed by an inch on each side of the brace.
Install the New Insulation
The first location you install a new piece of insulation should be the easiest and most accessible. Successfully applying the first piece will give you confidence for the rest. Peel the backing paper back about an inch along one edge. Position it in place and press it firmly onto the hood. With it held in place you can now peel off the remaining paper while pressing the insulation onto the hood. Keep it smooth and tight. Continue until all of the hood is done.
Many products such as Noico 80 need to be rolled after installation to get the full benefit of the soundproofing. Noico, as with others, has a foil face that comes from the factory having a puckered finish. To achieve the most successful install, the foil should be rolled smooth and flat. (Note: Most manufacturers sell a barrel roller installation tool for sound deadening installation–if you do not have one already.)

In many cases, you will need to butt pieces of insulation together. There is a chance of not getting a perfect fit every time. If that happens, do not pull off a piece to try reposition it. Once removed–even if you get it off in one piece–the back has lost its adhesiveness, and you may have to clean any residual stickiness off the hood before attaching the next piece.
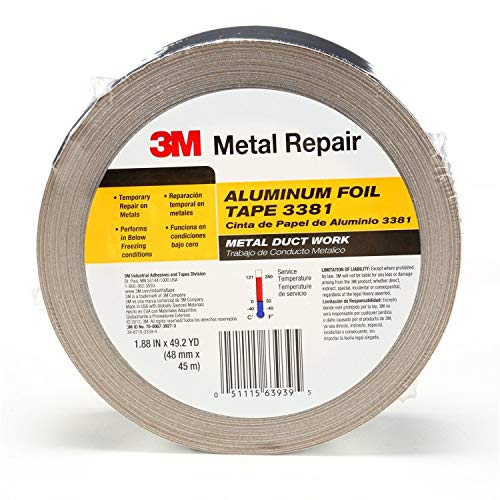
If you do end up with a mis-fit or two, it will either be a gap, or an overlap. (If it is really not your day, there could be a gap at one end of the join and an overlap at the other.) You can cut a strip of insulation to cover the gap. Or buy purpose-made sealing tape from the manufacturer. Or use foil insulation tape. An overlap can be repaired by carefully cutting off the excess. (It is only sticking to the foil face of the piece below and should come off easily.)

Once all of the product is installed, just roll it smooth, flat, and shiny. And you are done. Unless you have decided to cover all of the braces. If that is your choice, take the strips you cut and install them on all the braces. Do not just peel off the paper and slap them on. Take a little time and pull the paper back on one long edge and install the soundproofing from one side of the brace to the other side, working it to conform tightly to the shape of the brace. This makes it easier to eliminate air bubbles and wrinkles. Roll it flat. You may want to get an ITEQ Sound Deadening Roller Kit instead of just one wide roller because the narrower wheels will work better on the angles of the braces. (Note: If you do not have faith in the overlapping edges sealing tightly to the other foil, you can use the manufacturer’s sealing tape or foil insulation tape to be doubly sure.
Installation notes and suggestions:
- I would not peel all the backing off a piece before installing it. Only removing an inch to start with allows you to get it into position easier without the remaining material getting stuck to the hood, itself, or your arm–all the places you do not want it.
- As with most peel and stick products, do not let the sticky surface touch itself because you will be throwing that piece out. It will never come apart in such a way to be reusable.
- Even if your existing hood insulation is a one-piece product, give serious consideration to installing the new product in sections. Trying to put up 20 or 30 square feet of somewhat limp mass butyl is difficult and prone to causing mistakes.
If you bought too much product and have no other use for it, don’t be shy–you can double it up under your hood for better soundproofing.
Factory Made Under Hood Insulation Replacement
 This is also an easy DIY project. If your vehicle came with a one-piece, factory-installed hood insulation, you can order a new one from the dealer or probably from a parts store. Just detach the old one and install the new one–usually with the same fasteners. (The hood insulation in our Mazda is held on with about twenty 1″ diameter press-in plastic buttons. Should be a simple operation.) You may want to try removing one or two fasteners before ordering the new insulation–just in case they break and you have to order new ones. (I would probably just order new ones–such as Unenda Hood Insulation Retainers–with the new liner. Most of those vinyl fish-hook-type holders work really well until you remove them–when they will break, or not hold when reused.)
Note: I have not checked prices, but I would be willing to bet that this option is more expensive.

Why Insulate Under the Hood?
People insulate vehicle hoods for a couple of reasons–to provide a little more quiet in the vehicle cabin and to control temperature and protect the paint on the hood.
Make Your Ride Quieter
This may not make any sense to you but it works. Not only will the insulation/soundproofing reduce motor noise and road noise heard in the passenger compartment, it will reduce vibrations. Sound is energy and travels as a result of air particles or molecules vibrating. So cutting down the vibrations will also reduce sound inside the vehicle. It helps with both the sound coming through the hood and the vibrations transferred through the hood mounts, firewall and into the vehicle.
Control Temperature and Protect Hood Paint
Quite a few people worry about the sun causing damage to the paint finish on the vehicle’s hood. But heat from under the hood can do just as much, or more, damage. Not when you are driving. The radiator keeps the motor and motor compartment cool. But when you stop, all of that engine heat rises to the underside of your hood where it slowly dissipates. Under-hood insulation/soundproofing products will help to prevent that heat from damaging your paint.
DIY-Friendly Under Hood Insulation Products
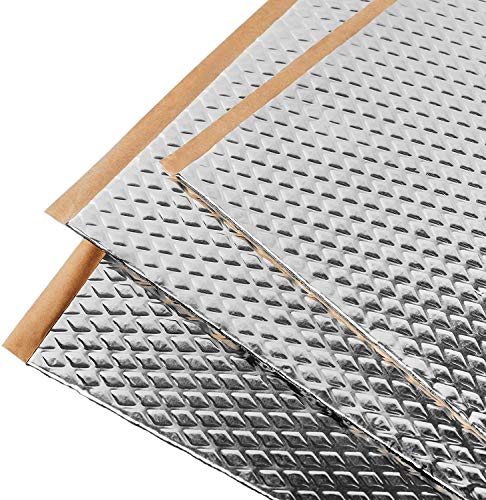
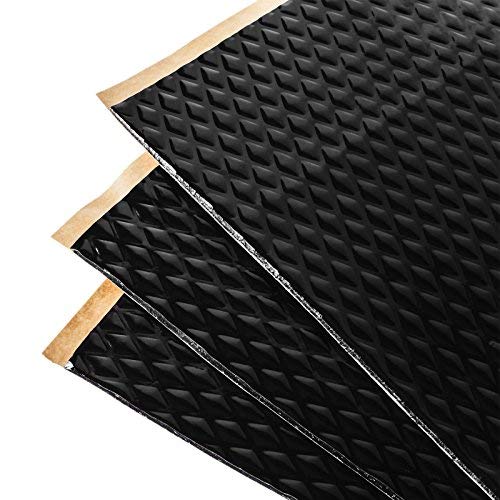
Vehicle soundproofing products will come in sheets of various sizes, or in rolls–depending on the manufacturer. (I like the smaller individual sheets, because when I screw up a cut, there is less waste.) There are 2 types of under hood insulation products.
- Sound Deadeners. Although most of these products are Butyl-based, they have many of the same noise canceling features as Mass Loaded Vinyl. They will absorb noise and the heavy glued-on limp mass will not allow sound waves to cause vibrations. It also provides some insulation value.
- Hood Liners. The main intent of hood liners is to control heat in the engine compartment. They will prevent your hood overheating, saving the paint finish. Liners also have sound absorbing properties.
For the best of both worlds, many people will use both types of products together. First installing the thin sound deadening material, then adding the insulating hood liner on top of it.
Note: I have used the terms interchangeably throughout the article along with under hood insulation. Because although the products are somewhat different, they all accomplish the same things–absorbing sound, decreasing vibrations, and protecting the paint on your hood. Which product you choose depends on your priorities.
For more detailed information on automotive self-sticking soundproofing products please see our article Kilmat vs Noico vs Dynamat vs Hushmat.
Sound Deadening Products
Sound deadening products are exactly what the name implies. They are usually a foil-faced, butyl based material with a self-adhesive back that allows it to be attached where required. Sound deadeners are not just for hoods. They are used everywhere in the vehicle to make the drive quiet–floor, roof, trunk, doors, etc. Here are 2 of the most popular choices.
For more information on uses for sound deadening products please see our article How to Fix Car Speaker Rattle.
Noico 80 mil Sound Deadening Mat
Noico 80 mil Sound Deadening Mat is a cost effective, relatively thick and heavy butyl weighing 0.7 lbs./square foot. At 80 thickness (about 2 mm or an eigth of an inch), it is one of the heavier self-adhesive sound deadening mats available. Noico 80 Black is available with a black foil finish–for anyone not liking a shiny under hood look.
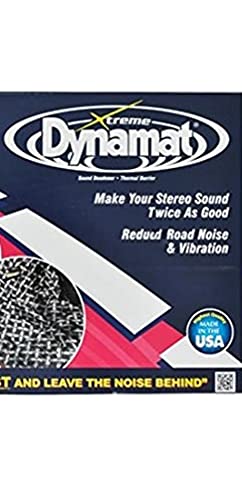
Dynamat Xtreme Sound Deadener
Hood Lining Products
Although hood liners will control noise and vibrations to some extent, their main function is heat control. They reduce the temperature of the vehicle’s hood that accumulates from motor heat. They will also keep the heat out of a standing vehicle so your motor will be cooler on starting. Can be used throughout the vehicle to reduce heat. Here are a couple of options.
Note: 1 mil = 1/1000 of an inch, so the following products at 394 mils are equal to 394/1000 thick which is about 2/5 of an inch.
Uxcell 394 mil Hood Liner

Uxcell 394 mil Hood Liner is made of a thick high density foam/cotton mixture with a self-adhesive back and foil face. Good for temperatures up to 150 degrees Celsius (over 300 degrees Fahrenheit), it comes in one piece and provides better performance when installed without any joins.
Uxcell 394 mil Hood Insulation Pad
Uxcell 394 mil Hood Insulation Pad is manufactured of closed-cell foam sandwiched between an adhesive backer and aluminum foil face. The single sheet can be ordered in sizes from 6.4 square feet to 32 square feet–then cut to fit your application. It is water-resistant and the adhesive sticks like poop to a blanket, so taking it through a car wash should not cause any problems.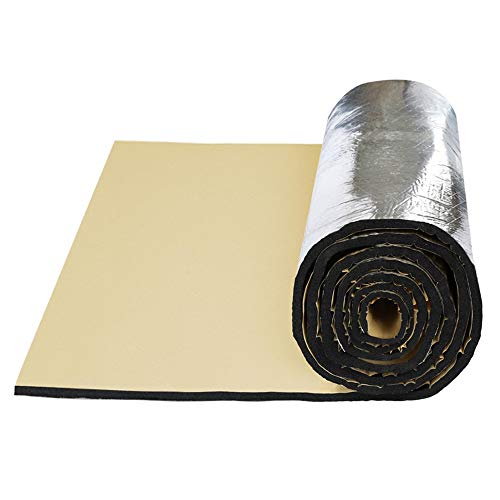
End Notes
The biggest problem I have when working under my Dodge truck’s hood is big truck and short arms–making a 2′ or 3′ step ladder or stool fairly essential. Does not seem to be a problem with the Mazda.