
Windows are a great way to let in light and fresh air and are a Code requirement in most areas. However, they aren’t the best sound barriers. So if you need to prevent noise from going in or out of a window, the best solution is a soundproof window plug.
While this article deals with window plugs, how to soundproof a window provides a thorough explanation of many more window soundproofing techniques.
A tight sealing soundproof window plug with good thermal properties will help reduce noise transfer. The more mass the plug has, the better it will decrease sound movement. Using viscoelastic material will help damp vibrational resonance. Also, leaving dead airspace between the window and insert will trap low frequencies.
In this article, I’ll discuss DIY window plugs. I’ll explain how they work, benefits and disadvantages, and what materials work best. I’ll then explain how to make an insert to plug unwanted noise movement.
For more information and some other options for making a window quieter, please see our articles Soundproof Blankets for Windows and Best Soundproof Blinds of 2023.

What are Soundproofing Plugs for Windows?
A soundproof plug for a window is a permanent or removable insert that covers the inside window opening preventing light, air, and noise from entering or leaving a room. It is an alternative to replacing a window with an acoustic window or adding another window to the opening.
Plugs are often made of mid to high-density material to provide mass to block noise and insulation to absorb sound. A viscoelastic material like Green Glue may be used between mass layers to damp resonance.
To seal around the perimeter, use flexible high-density foam to decouple the plug from the window framework, further decreasing noise transfer. Whether removable or permanent, the insert should reduce sound movement into and out of a room.
The plug should be made-to-measure for the window where it will be used. It can be used in a bedroom to improve sleep, a sound studio or media room for acoustical control, or a home office to improve concentration and confidentiality.
Benefits
- Reduces sound transmission.
- Blocks light filtration.
- Prevents fading, discoloration, and damage to furniture, paintings, and flooring.
- Decreased utility costs.
- An inexpensive solution for homeowners and renters.
Disadvantages
- Heavy or bulky to move or store.
- May not block low-frequency sound.
- Loss of sunlight and fresh air when installed.
- Can’t see outside.
Best Materials for Building Window Plugs
The size of the window opening is a factor in material choices. Small windows may not need extra support that larger windows will require. MDF is heavy but blocks and reflects sound waves, while plywood and OSB won’t.
There are other fiberboards; however, they lack effective mass. Two thin layers of MDF with Green Glue sandwiched between are better than one layer with the same thickness as the two.
Expensive 2-inch thick Neoprene foam mats will absorb noise. Cheaper rigid stone wool or fiberglass panels will do the same job with the same thickness.
The foam and insulation won’t block low frequencies though. Also, windows larger than 4’x4’ need something to stiffen and support them.
If the plug is permanent, add a reflective film layer close to the window. It will help to decrease heat build-up in the airspace between the glass and the plug. Do this especially for south or west-facing windows. The airspace should be at least the same depth as the plug, and the plug shouldn’t touch the window.
To seal the plug within the window box, compression works best. Wrap neoprene foam or a similar material around the plug’s perimeter. Secure it with an adhesive or joist tape. The seal should prevent all light and air movement, and thus sound transfer.
If you’re concerned about what the insert will look like from inside or out, there are several options. Wrap the whole plug in a solid color or print fabric. Take a picture or choose one that suits your mood.
Have it printed on canvas a couple of inches larger than your window. Use the canvas to wrap the side of the plug you are concerned about or do both sides. You could also hang a curtain or lace next to the glass before inserting the plug.
How to Make Soundproofing Window Plug: Step by Step
Windows provide light, fresh air, and an emergency exit. They also allow sound to travel in and out of a building. A soundproof window plug is one solution to noise transfer and light intrusion. The style of the window and its size are starting points when making an insert.
Some windows have an exterior sill and are flush or almost flush with the interior wall. Other windows have little or no exterior sill and have a deep interior window well. And some are in the middle with an interior and exterior sill.
Step 1:
Measure the interior window well length, width, and depth. Half the depth should be left as dead-air space to control low-frequency noise, so the deeper the interior well, the better.
The window box dimensions I’m using are 20” high x 38” wide, with an interior 10” deep sill. The plug will be 20”x 38”x5” and weigh approximately 35-pounds. The half sheet of MDF makes up 29 pounds of the weight.
Step 2:
Determine if the plug will fit fully inside the window well, or if it will have a lip that fits flush against the wall; or both.
My plug will fit fully within the well.
Step 3:
Gather the materials and tools you’ll need for the job.
Tools – tape measure, saw, drill/driver, screws, square, utility knife, stapler, caulking gun, hammer, level,
Materials – 1/2″x4’x4’ MDF, , two 1”x4”x8’ pine, two 2”-inch 2’x4’ panels of (8 lb/ft³ density), 2 yards fabric, one neoprene yoga mat (not your wife’s!), contact cement or spray glue, and two gate handles.
Step 4:
Lay out the MDF and measure for the cuts. The neoprene is 5/8” thick when lightly compressed, so I subtracted 1-1/4” from the length and width. I cut out two pieces 18-3/4”x36-3/4”. Cut the 1”x4” pine, so you have two 36-3/4” and two 17-1/4” to make a perimeter box on the MDF.
Step 5:
Assemble and fasten the pine to form a 36-3/4”x18-3/4” box. Lay one MDF sheet flush on the pine frame. Apply Green Glue to one face of that sheet. Align the second piece of MDF on the first, sandwiching the glue in between. Pre-drill pilot holes around the perimeter and fasten the two sheets to the frame.
Step 6:
Flip the plug over, so the pine frame is up. Cut the neoprene mat into 4.5-inch wide strips. Cut two pieces 18-3/4” for the ends. Add the thickness of the two pieces to the 36-3/4” dimension, and cut two pieces that length.
Step 7:
Coat the outside perimeter of the plug with rubber cement or adhesive. Press the two short pieces into place. Do the same with the long pieces. Remember to apply extra glue to the ends of the short pieces where they overlap. I used spare 1”x4” pine and C-clamps to hold the foam in place while the glue set. Test fit when dry.
Step 8:
Cut the Rockboard to fit tightly in the frame. Insert the two panels on top of each other in the frame. The top piece will stick out above the frame by a 1/2”.
Step 9:
Lay out the fabric good-side down. Make sure it is flat and not wrinkled. Spray adhesive onto the MDF face of the plug. Lay the MDF face down 6” in from the edge on the long fabric side, and equal distance from the ends – keep the fabric smooth and tight.
Step 10:
Wrap the 6-inches of fabric around the side and staple it to the pine to keep it tight. Wrap the fabric up the opposite side of the plug. Pull it tight and staple to the pine frame. Pull the rest of the fabric over the insulation. Pull tight, tuck the edge and staple. Trim off the excess. Repeat the steps with the two ends.
Step 11:
Secure the handles to the MDF – remember to pre-drill pilot holes.
Insert the soundproof plug into the window well and enjoy the quiet. If you’re concerned that the plug may fall out, stretch a bungee cord across it, or put a toggle above the window opening to catch the top. If the noise is still loud, hang a piece of MLV across the window before inserting the plug.
Ideas on How to Build DIY Window Plug
1. Soundproofing Windows with Homemade Plugs
This is an explanation about building a plug using leftover building materials. It’s a straight forward design requiring minimal tools. The post includes pictures of different stages of construction, plus decibel meter readings.
Constructed using two pieces of drywall with a layer of Green Glue sandwiched in between. Two pieces of wood per side were screwed together through the gypsum to hold everything together.
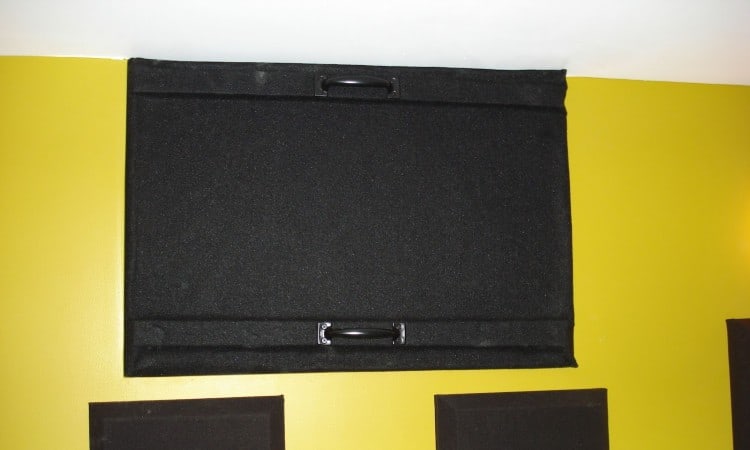
Green Glue joist tape was wrapped around the edges to give a soft, flexible seal for the insert. Tuck tape was then wrapped over the joist tape to keep it in place. Speaker carpet and carpet glue were used to cover the plug for a more professional look.
A handle was fastened to the middle of each board on one side to make it easier to use.
Build this window plug
2. Window Plug
This is a thread about making a media room and preparing windows for a window plug. It also discusses making a plug for the window and includes pictures. This is not a light-weight plug as two 4’x8’ sheets of 3/4” MDF were used in the construction. It is also not easy to remove.
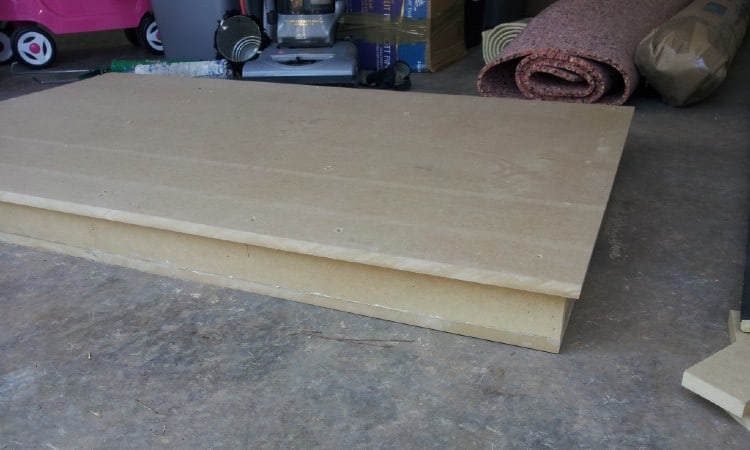
An open face box was made using MDF, with the sides glued and brad nailed into place. Ripped 2×4 pieces make up a supportive internal frame, with extra support at 16” centers. Fiberglass batting was used to fill the box.
The framework was sealed with caulking, and a piece of plywood inserted and fastened into place. Green Glue was applied to the plywood, and a larger slab of 3/4″ MDF fastened into place, providing a 3/4” lip all the way around to seal against the window frame.
A 2×2 frame was attached to the perimeter of the larger MDF and filled with mineral wool. The MDF box was painted white, and black cloth covered the mineral wool and 2×2 frame.
The Plug had to be lifted by two people and then pounded into place.
Build this window plug
3. DIY Soundproof Window Plugs
This post is a step by step on building a thin removable window plug. It includes a material and tool list, plus pictures. The side-by-side windows only had a 4-inch interior sill, so a thick plug wasn’t an option. A plug was made for each window for ease of use.
Drywall was cut to fit each window space, and 1/2″ acoustic sound board cut to match and glued together. Rubber 3dB acoustic barrier was glued to the sound board with lots of glue.
The acoustic barrier rubber extended about 3-inches on all sides, so that it could wrap the foam and secure it to the back of the plug. Extra drying time was required. Sponge acoustic foam wraps the perimeter to provide a seal.
The second piece of drywall was glued to the other face of the acoustic board, sandwiching it. Fiberglass batting was placed on the drywall and wrapped into place with fabric.
Metal brackets hold the plugs in place. A sound blanket was added to curtain the window area to provide additional high-frequency control.
Build this window plug
4. DIY Plug to Insulate a Window
The video is about building a window plug for a basement workshop to keep winter cold out. Yet be removable to allow light through when needed. It is light-weight in comparison to soundproof inserts that use mass to block or reflect sound. However, the build material could be easily modified to be more soundproof.
The build begins with a frame made from recycled pallet wood to fit snug inside the interior window box. The wood was planed smooth to a 1/4” thickness. The box was filled with a 2-inch thick slab of rigid pink foam and covered with 1/4″ plywood.
The plywood overlapped the frame to seal against the window box. Two handles were attached to make removal easier. The face was then painted white to finish it off.
5. Soundproof Plug to Improve Sleep
This is a video demonstrating building a 38”x46” soundproof window plug for a baby’s room. It needs to keep disruptive traffic and pedestrian sounds out.
It is a light-weight solution to mute outdoor noise. The plan allows for a section to be removed for the seasonal use of an air-conditioner. A material list is included, and the total cost was about $50.
The frame construction is 1×2 strapping screwed together. A layer of 1-inch rigid pink foam filled the frame sections. Fiberglass batten covered the foam in the main section of the window plug.
Outdoor fabric was used to cover that section of the frame and stapled taut to keep the insulation in place. The solution for the other two sections was to wrap the fiberglass and foam in cloth.
It would then compression fit into place. A strip of neoprene weather stripping around the frame perimeter improved the seal and fit.
6. Soundproofing a Large Window with Interlocking Plugs
This is a how-to video for making a heavy-duty soundproof plug for a home music and recording studio. It begins with a finished product, shows the installation process, and how it is secured into place. The interior window sill and box are deep, so 100mm (4”) thick plug would fit. The plug controls noise, plus improves security.
The frame and back are 3/4″ MDF. All seams were sealed with acoustic sealant throughout the build. Acoustic insulation cut to fit tight in the box. Cement backer board covered the insulation, and another layer of 3/4″ MDF finished the back of the box.
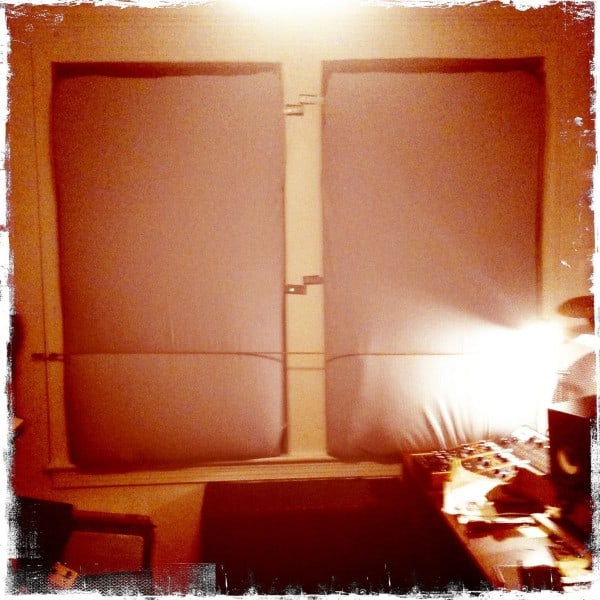
Due to the weight of the materials, two plugs were made to fill a larger window, and interlock together. Spray adhesive secured acoustic foam to the back of the box to seal against the window.
Handles to make lifting easier, and slide-bolts hold them in place were then added.
Conclusion
A DIY soundproof window plug is a great way to reduce unwanted noise movement. It will also insulate and darken a room, decreasing utility costs, and light damage.
Remember, an effective sound barrier needs mass to block or reflect noise. Use a fibrous insulation to trap and absorb soundwaves. Plus, it needs to be decoupled and sealed to prevent transfer.
I hope you found this article of use in your quest for sound control. If you did, pass it on. As always, your suggestions and comments are appreciated.