Why would you want to, or need to, soundproof a closet. Turns out there are quite a few good, viable reasons. Maybe to use it as a recording space. Maybe to just play music–or listen to music, without disruptions. An intimate home theater off the master bedroom. A small private office space? Maybe to keep noise out of the living space.
Then of course, there are size questions. A walk-in closet can appear pretty large, until you start putting things into it. (My office is 10′ x 10′ but after a couple of desks, filing cabinet, chair, shelving, etc. it can feel cramped.) Here are a few options and suggestions you can use to soundproof and acoustically sound treat your closet.
Soundproofing a Closet to Make a Quiet Room
Regardless of your reasons for soundproofing a closet, the basic principles remain the same. Isolating the room from the intrusion of incoming noise is usually the first concern. Then, preventing any sounds made inside the room from annoying family and neighbors.
But keep in mind that if this is only a solution to a temporary problem, and your closet is full, you could just hang soundproof blankets to make it even quieter while you need it. Most things found in a closet are pretty good soundproofing materials. Adding heavy sound absorbing moving blankets like US Cargo Control Large Sound Blanket can help make a quiet space even quieter–quickly and inexpensively. They are 80″ x 96″ so will hang ceiling to floor in most homes. For more on soundproof blankets please see our article Soundproof Blankets for Windows, and Moving Blankets for Soundproofing Rooms in 2023.
Having said that, let’s look at more permanent options.
To Empty or Not to Empty?
In most cases, it is easier to work in the room when it is totally empty. You will also do a much better job–and reduce your level of frustration–if you can get to every nook and cranny. Cutting soundproofing material around shelving, hooks, and drawers will invariably leave gaps that allow sound to penetrate into, or out of, the room.
Note: Keep in mind you also will have to find a place for all of the stuff you are removing.
Soundproof the Floor
- Carpet/Rug. The easiest, and quickest method of soundproofing the floor is to add rug to whatever is there now. You can add another layer of carpet over an existing carpet–even 2 new layers if you like. This will certainly reduce any impact noise (like footsteps, or dropping something) that you create inside the room. Carpet will also absorb incoming noise from below or flanking noise that is seeping under the wall from adjacent rooms. (This is called flanking noise because it travels around the wall, and through the void in the floor to appear in the room next door.) Thick, heavy wool rug is the best choice.
- Carpet Underlayment. For even better floor soundproofing, install 1/2″ RugPadUSA underlayment before putting down rug. It can also be used over existing carpet. I would have a roll of good carpet tape handy to help keep all of the various layers in place.
- Laminate/Hardwood Floor. If your closet has laminate flooring that is not nailed down, you have the option of pulling it up and putting down QuietWalk Plus underlayment, then re-installing the flooring. Made specifically for laminate flooring, QuietWalk Plus provides excellent sound reduction. It can also be used with, or without, RugPadUSA if you intend to lay new rug over hardwood or laminate.
For much more information on flooring underlayment, please see our article Best Soundproof Underlayment.
Soundproof the Ceiling
If the space above your closet is roof or attic, your only noise concern should be flanking noise from adjacent rooms. Or the sounds from your closet becoming flanking noise into adjacent rooms. On the other hand, if you live in an apartment, condo, or 2 story home, it will take a little more thought and effort to stop the noise entering or exiting through the ceiling.
- Cellulose Insulation. One of the best, and easiest soundproofing products for an attic is blown in loose-fill cellulose insulation. 10 inches added above the closet, or into the entire attic, will about eliminate any flanking noise coming into, or escaping from, the closet.
- Double Drywall. Mass is always the sound proofers best friend. The thicker and heavier a barrier is, the harder it is for sound energy to cause molecular vibrations that pass through walls. Less vibration= less noise transference. Adding at least one layer of 5/8″ drywall to the existing ceiling will increase mass. QuietRock 5/8″ drywall is another option with the added benefit of a viscoelastic sound absorbing polymer sandwiched between 2 layers of drywall.
- Drywall and Green Glue. Sandwiching Green Glue between drywall layers will perform the same as QuietRock. Green Glue is also a viscoelastic damping compound that dissipates vibrations by turning sound energy into heat (very little heat–so not anywhere near a fire hazard). Green Glue only works between 2 smooth surfaces, so if your ceiling is textured, it will need to be scraped smooth. Or you can add 2 new layers of drywall with Green Glue between them. Attach the first layer of drywall to the ceiling, then glue, then second layer of drywall. (Make sure the joints of the two layers do not line up.)
 QuietRock Soundproofing Drywall
Soundproof the Walls
Soundproofing the walls is easier than soundproofing the ceiling. Here are some options you may want to consider.
- Mass Loaded Vinyl (MLV). One of soundproofing’s most enduring and popular products, MLV is known as limp mass weighing up to 2 lbs. per square foot, and can be attached directly to the existing wall. It has an STC rating of 23, meaning it can reduce noise by up to 23 decibels. Once it is on the wall, you can add a layer or two of drywall or QuietRock. Mass Loaded Vinyl is also paintable (with latex paint). If I were planning to paint it, I would make sure it was installed bottom row first, with a 4″ overlap of the next row, and on to the ceiling. Make it smooth and tight with the nails in rows horizontally. Then paint it and get some good-looking 1 x 4 or 4″ wide molding to cover the rows of nails. It can be made to look quite good without having to mud and tape and paint drywall. Or extend electrical, HVAC, or door jambs.
- Double drywall. The more mass, the better. Adding one, or even two, layers of 5/8″ drywall will help quiet your closet. And you can install standard drywall or QuietRock over your MLV.
- Drywall and Green Glue. Instead of MLV attached to the existing wall, you can add one layer of drywall and sandwich Green Glue between them. Or you can add 2 layers of drywall with Green Glue sandwiched between both. If you are giving some thought to both MLV and Green Glue, you have to add 2 layers of drywall. Green Glue is made to be installed between two hard surfaces. You cannot use MLV with Green Glue pressed onto it. You will lose the effectiveness of both.
For much more on soundproofing walls without demolition please see our article 15 Ways of Soundproofing Interior Walls Without Removing Drywall,
Soundproof the Door
The door into your closet is the weakest point when it comes to soundproofing–and the toughest to cure.
Most interior door frames have no insulation between the jamb and wall framing. It is an area that is easy to overlook when soundproofing. Remove the casing from one side of the door jamb, spray an inch of low expansion foam into the cavity against the backside of the remaining casing, fill the balance of the cavity with Roxul soundproofing rockwool (or fiberglass batt), and reinstall the casing. (Note: Do not pack insulation tight.) Re-install casing and use paintable caulking to seal it to the wall and door jamb.
Note: If you are adding extra thickness to the walls, you will have to extend the door jambs to match the new wall depth before re-installing the interior casing.

- Single door. Most interior door slabs are hollow core, making them somewhat pathetic for soundproofing. If at all possible, replace it with solid wood, or solid core slab. Install Weatherstrip on the door stops and Holikme Twin Door Draft Stopper on the door bottom. (The Holikme door sweep is made of cloth wrapped foam. I am not a fan of the rubber-type sweeps because they wear out quicker and can be difficult to adjust.) For more detailed information please see How to Soundproof a Door, How to Soundproof a Hollow Door.
B0925BH4JV
- Pocket door. Pocket doors are also usually hollow core slabs and have the added disadvantage of big gaps all around them, and a hollow wall. Although they are difficult to soundproof, it is not impossible. For detailed information on how to get the job done, please see How to Soundproof a Pocket Door.
- Double door. Double doors or French doors quite often have glass inserts in the slabs. This presents different problems because the glass is usually single glazed–which is not a great soundproofing product. The glass can be replaced with laminated glass for better soundproofing. Install TZSEAL Weatherstrip on the door stops, and Holikme Twin Door Draft Stopper on both doors. A piece of 1 3/8″ door stop attached to one door in such a way that it overlaps the other door should cover the centre gap. For detailed solutions to soundproofing double doors please see How to Soundproof French Doors.
- Bi-fold door. There is really only one way to soundproof bi-fold doors. Take them off, throw them away, and install another door–preferably a solid core single door. Depending on size, you may have to modify the opening to accept your new door and frame. Then soundproof the new unit with Weatherstrip and Holikme Twin Door Draft Stopper. (Make sure you insulate and soundproof between the new jamb and wall framing.)
- Curtains and Blankets. Regardless of which type of door you have, after soundproofing it, you may still want to hang a soundproof curtain or blanket in front of it. Because even with all of the time, money, and effort you put into soundproofing, it will still likely allow more sound transmission than floor, walls, or ceiling. A few options to consider are Nicetown Soundproofing Curtains, US Cargo Moving Blankets, or AcoustiDoor from Residential Acoustics.
Seal and Fill the Gaps
I always have a bit of an organizational problem with this section–because generally, filling gaps and sealing is done as you go through the project–not just at the end. Sound waves are a bit like air. Wherever air penetrates your room envelope noise comes with it. Because sound waves are the vibration of molecules producing sound for as long as the energy wave continues. So, in no particular order here are some of the places to seal.
- Sill Plate. Assuming that you will be removing casing and baseboard to add drywall, MLV, resilient channel, or whatever you choose–make sure you caulk the seam where the sill plate sits on the subfloor. Wood warps, plywood and OSB sags or bows and gaps appear at that location. Brush any dust away from the work area and run about 1/4″ bead of good acoustical caulking along the join. This will be covered when you re-install the baseboard.
- Casing and Baseboard. Seal casing and baseboard to walls and door frames with good paintable caulking.
- HVAC. If the closet is big enough, there is probably at least one type of air vent in it. Remove the cover and seal around the pipe with acoustical caulking. (Note: If the gap is bigger than 1/4″, you will probably have to with something like foam packing rod or spray foam insulation–then covering it with caulking.) You may also be extending the vent pipe if you are adding significantly to the wall thickness.
- Electrical outlets. Plugs, switches, and light fixtures are almost never sealed if they are on interior walls. Remove the covers, and use acoustical caulking to seal the gaps between drywall and box. You may need some type of backing to fill gaps bigger than 1/4″. (If you are adding to your wall thickness, you will need electric box extenders.) Cover the outlet with a Morris Round Gasket or a Trade Gear Wall Plate Insulation Gasket and replace the cover.
- Wall cracks. Use acoustical caulking to fill any other crack in the existing drywall before installing new drywall.
Note: Acoustic caulking never dries. Make sure you only use it where it will be covered. I have seen some suggestions that it skins over and you can paint it. That will be true the day you see Porky the Pig flying over your house.
Build a Room-Within-a-Room
This is about the only soundproofing solution that will provide a near 100% soundproof room. But if you need and/or want the quietest music studio or home theater or soundless work space please see our article How to Build a Soundproof Room-Within-a-Room. This type of project is usually more time consuming and expensive than the other options I have listed, because you are literally constructing new floor, walls, and ceiling almost totally decoupled from the existing room. You will also lose about 6″ of floor area adjacent to the existing walls (In my 10′ x 10′ office that is about 20 square feet. Make certain you can afford the lost space before deciding on this option.) and about 1 foot in total height.
Soundproofing a Closet to Make a Music Studio
Generally this is a ‘keep the sound in’ soundproofing project. Obviously, you do not want too much external noise intruding if you are recording. It can also be depressing to find your wife waiting for you with a blunt implement when you come out of the closet. Because too much sound is escaping into the rest of the house.
All of the soundproofing recommendations listed above will make your closet quieter–for incoming noise and outgoing sound. But if it is going to be a recording studio, mini home theater, or room used for drums, singing, or band practice, you will need to add acoustic treatment to your plans. Quite often the terms soundproofing and acoustics are used interchangeably. They are not the same thing.
Closet Soundproofing
Closet soundproofing involves the use of certain materials–some fairly specialized–to reduce, or preferably eliminate, external noise from entering a space. If done properly, soundproofing will address Airborne Noise, Impact Noise, and Flanking Noise. Hopefully, we have addressed a significant amount of that.
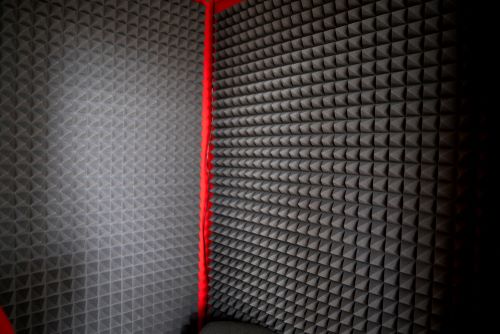
Closet Acoustics
Acoustic materials are designed to improve the quality of sound inside a space. Or, at the very least, prevent the room from making it worse. For instance, untreated parallel walls create standing waves that bounce back and forth between surfaces and get into recording equipment. The same walls will create echoes. Low frequency (bass) sound waves somehow manage to gather in room corners to mess up the purity of sound.
The judicious installation of acoustic panels, acoustic diffusers, and bass traps will improve the quality of recording music, listening to music, watching movies, and even gaming. Sound treating your closet should not be terribly expensive. It is probably much smaller than other rooms in the house, and you only need to treat about 30% of the room to see real positive results. For much more detailed information on the use of acoustic products to get the most out of a room, and more detailed soundproofing options, please look at one, or more, of the following articles:
How to Soundproof a Room for Drums
How to Soundproof a Home Theater
How to Block Out Low Frequency Noise
End Notes
Cautionary Note
Just a bit of a cautionary note: Closets are usually much smaller than most other rooms in your house. With a correspondingly smaller volume of air. And most of them do not have windows or much in the way of ventilation. If your soundproofing efforts are very successful, and you create an almost air-tight room, there could be a problem with the amount of air exchange in the room. You might want to consider leaving the sweep off the bottom of the door to allow some oxygen to get in. Yes, you are going to allow noise to either enter or exit the room, and blue can be a very attractive color–not so much if it is your skin color.